🔒 Sovereign
No account, no telemetry. Your files are plain .md on your disk; your AI runs on your keys or fully offline.
Markelangelo is a sovereign writing workshop, not just an editor. The AI works inside your document, your prompts are reusable tools, and nothing ever leaves your machine. Draft from nothing, interrogate what you've written, or reshape it for a new reader, all in place and on your own keys. This is the complete guide, with pictures.
Markelangelo looks like a beautiful markdown editor, and it is one. It also opens real Word documents and real spreadsheets. But what it really gives you is a sovereign writing workshop: a place to draft, interrogate and reshape documents with AI that works inside the page, on your own terms.
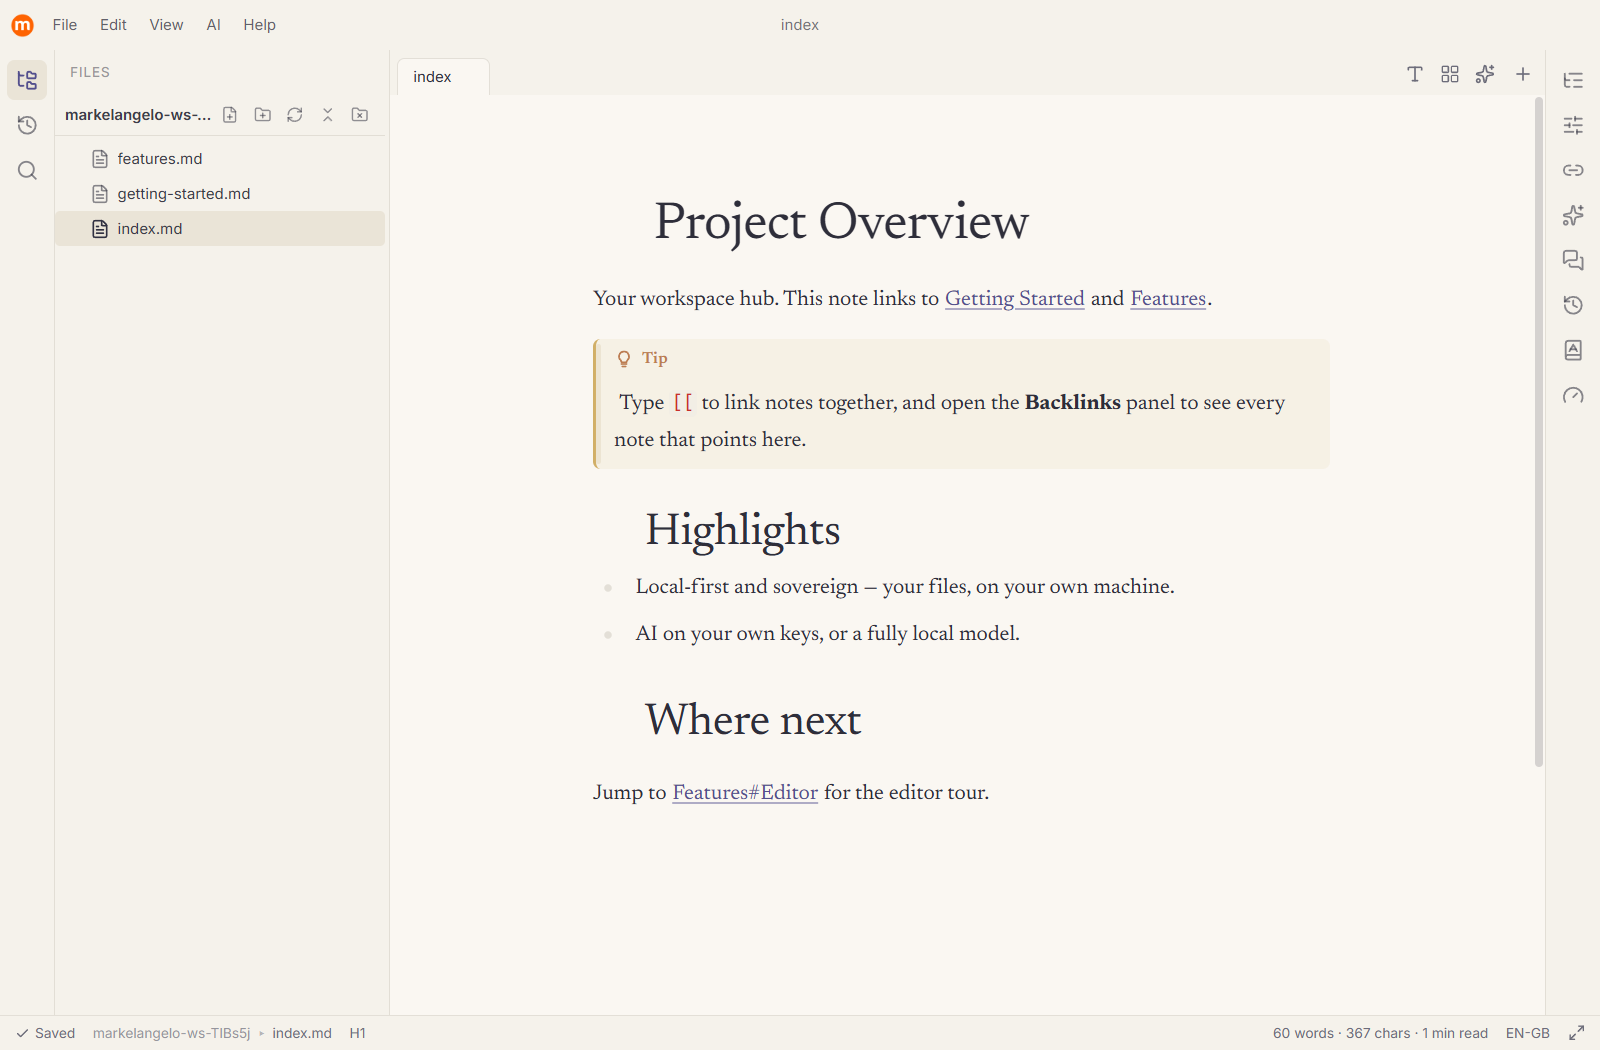
Everyone who writes serious documents does the same exhausting shuffle: draft in one window, paste into a chatbot in another, copy the answer back, re-fix the formatting, repeat. Markelangelo ends it. Your prompts become reusable tools that run inside your document and apply in place, and because they run on your own keys or a local model, your work never leaves your machine. See how the AI workshop works →
No account, no telemetry. Your files are plain .md on your disk; your AI runs on your keys or fully offline.
Draft, interrogate and transform documents in place, with a library of prompts you build and own.
[[wiki-links]], backlinks and chat-over-your-notes turn a folder into a living knowledge base.
Markdown, real Word documents and real spreadsheets, in one window, with the same AI working in all three. See the three worlds →
Standard markdown in, standard markdown out. No lock-in, take your work anywhere, any time.
Writers, researchers, consultants, note-takers and developers who want a fast, focused editor and a real AI workshop, without surrendering their data to someone else's servers. If you value owning your words as much as writing them, this was built for you.
From download to your first saved document in just a few minutes.
Markelangelo ships as an unsigned installer, so Windows SmartScreen may greet the first run with a warning. This is expected, the app simply isn't code-signed yet, not unsafe.
Once installed, Markelangelo keeps itself current. It quietly checks for new versions, and when one is ready it offers to download and install it for you, so you are always on the latest without hunting for a new installer. The only thing it ever asks the internet is "is there a newer version?"; your documents are never part of that.
[[note]]) and folder-wide search.Everything you save is plain markdown, exactly where you put it, ready to back up, sync or version however you like.
The AI stops lecturing you from a side-panel. It pins its notes to the exact sentences they're about, right in the margin, like comments beside a Word document, and each one becomes a conversation you can have, and settle, without ever leaving the page.
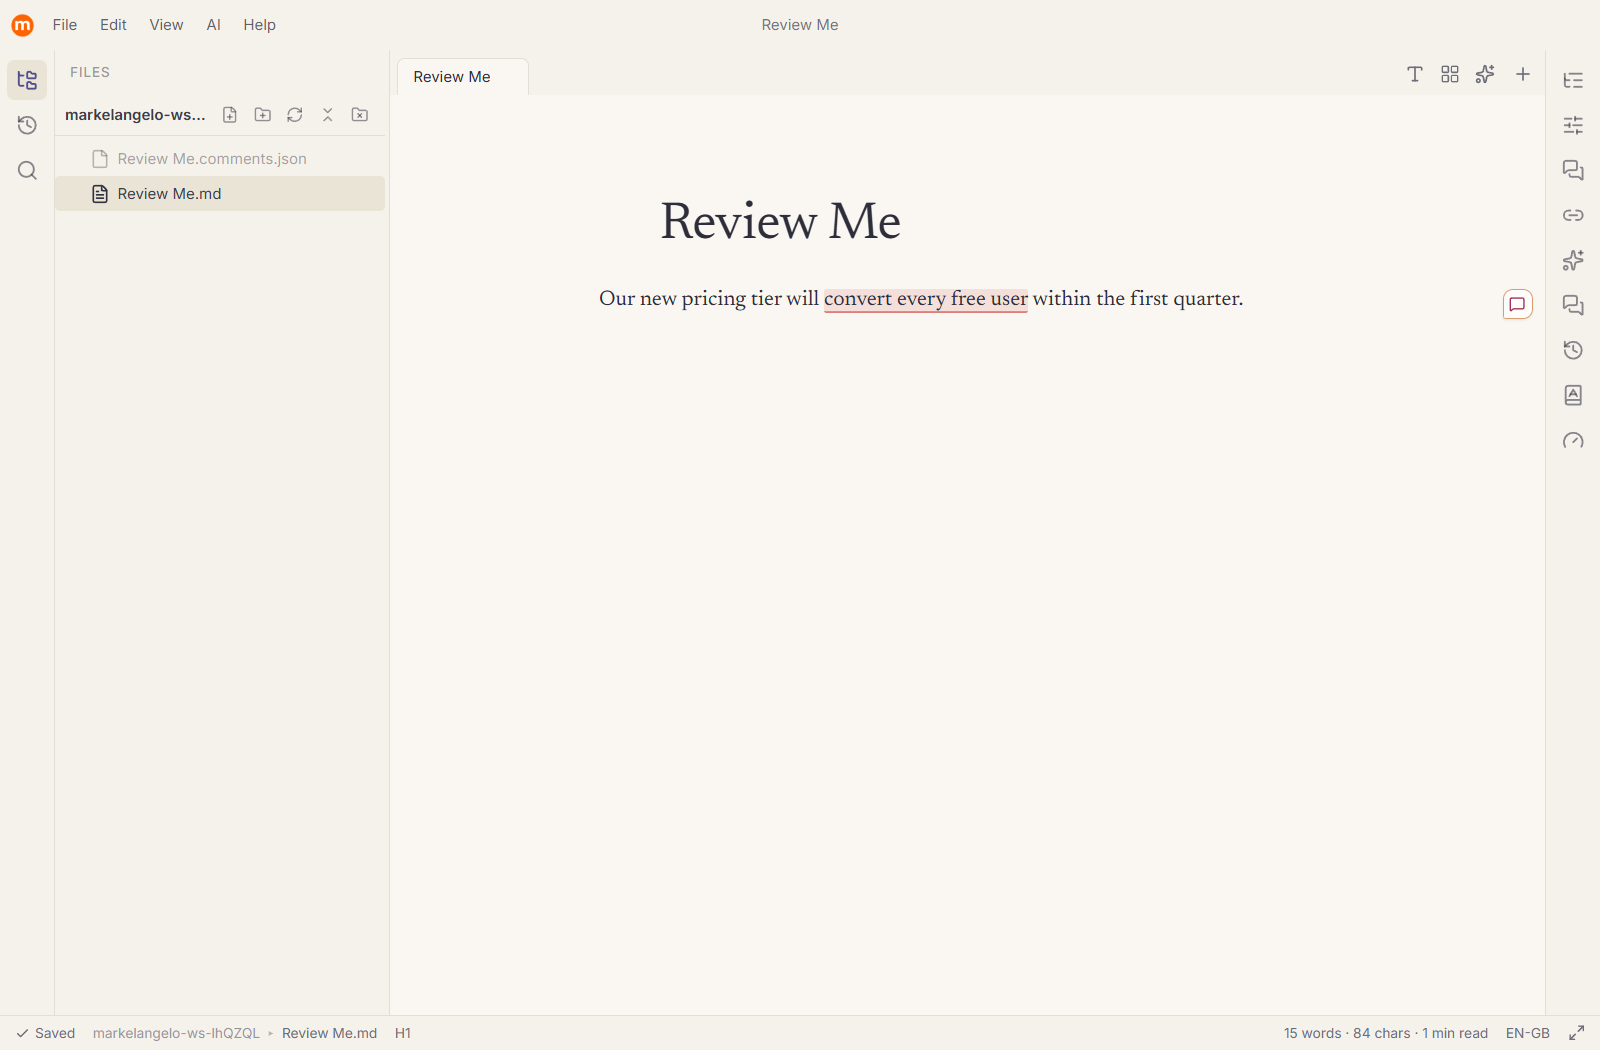
Ask a chatbot to critique your work and you get a wall of prose that you then have to map, by hand, back onto your own sentences. Markelangelo's review prompts (Devil's advocate, Evidence check and Clarity & concision) do that mapping for you. Each remark is anchored to the exact span it concerns, so you can see at a glance what needs attention, and precisely where.
Click a comment and it opens into a thread, a focused conversation with the AI about that one passage. Push back, add context ("I actually have the Q1 pilot numbers"), ask for options. Together you shape a proposed revision, and when you're happy you resolve it in a single click:
Swap the passage for the agreed revision, in place.
Keep the original and drop the alternative underneath it.
Turn the remark into a callout beside the text.
Send the whole discussion to a linked [[note]].
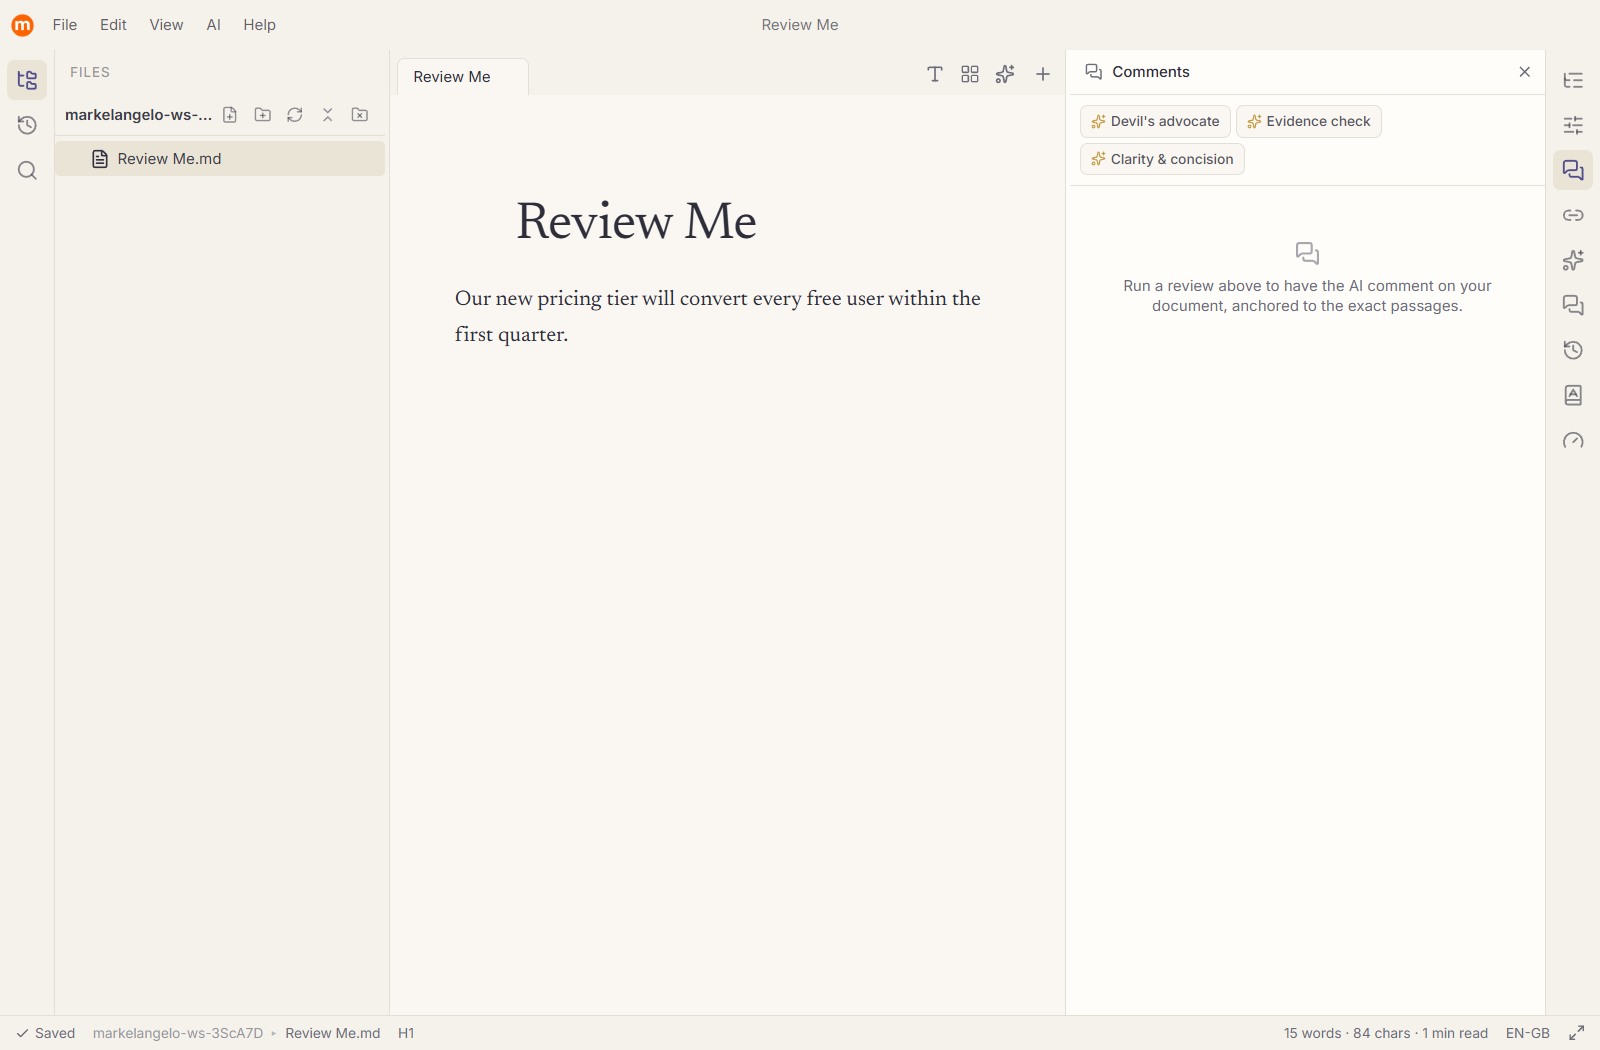
<document>.comments.json file beside your note, so they persist across sessions, never clutter your Markdown, and travel with your files. And like everything else here, the review runs on your own key or a fully local model, so your draft only ever goes where you send it. See Providers, keys & privacy.
Most apps bolt a chatbot onto a sidebar. Markelangelo does the opposite: the AI works on the document in front of you, in place, and the prompts you run are reusable tools you own.
You know the drill. Write in your document, copy a paragraph, switch to a chatbot tab, paste it, type the prompt, wait, copy the answer, switch back, paste it, re-fix the formatting the paste destroyed, then do it again for the next paragraph. Your best prompts live in a chat history you'll never find again, and every round trip sends your work to someone else's servers.
Markelangelo collapses that loop. Your prompts are saved, named, versioned and one keystroke away. You run them on a selection or the whole document; the result streams in beside your text, you see a word-level diff, and you apply it in place, or edit it first. Nothing gets copied out. Nothing gets pasted back.
Start from a prompt, not a blank page. Scaffold a business plan, draft a brief, outline a report, then fill it in.
Make the document talk back. "What's my weakest claim?" "Which assertions have no evidence?" "Answer this from the text only."
Improve, humanise, tighten, restructure, re-voice, translate or summarise, on a selection or the whole doc, applied where you're working.
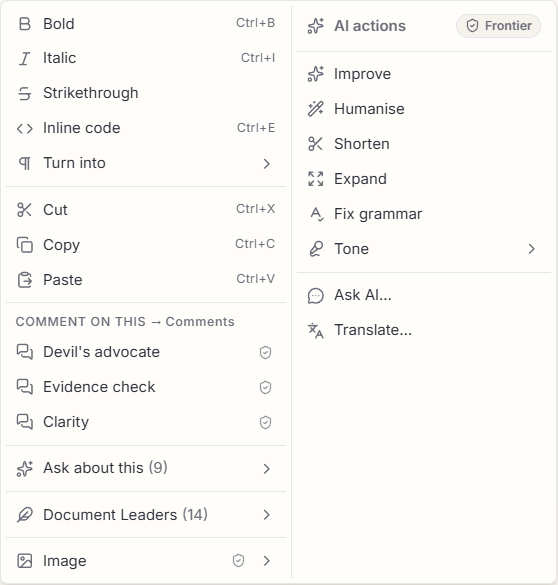
That is the whole design law. Select a passage and right-click, and the menu opens as two columns. The left keeps the familiar editing tools, formatting, synonyms, comment lenses, your saved prompts, Document Leaders and images. The right is a dedicated column of AI actions: Improve, Humanise, Shorten, Expand, Fix grammar, a Tone submenu, plus Translate and Ask AI. One selection, one menu, everything you can do to it.
These aren't hypotheticals. Every one below ships as a real prompt in your library, run it today, edit it, or fork it into your own. Real problems, real answers, all without leaving the page.
Business plan from a blank page. You know the pieces, market, model, financials, risks, but not where to start. Run Business plan and it scaffolds the whole structure into your document, with bullet prompts under every heading telling you exactly what to write. Then fill each section, using Challenge as you go to pressure-test your assumptions.
Any first draft. Draft takes a one-line brief, document type, topic, audience, and writes a structured first draft with clearly-marked [placeholders] where only you know the specifics. A blinking cursor becomes a working draft in ten seconds.
You're too close to your proposal to see the holes. "Play devil's advocate" reads the whole document and hands back your three weakest claims, the strongest counter-argument, and what a hostile reviewer attacks first, so you fix it before they find it.
A report full of confident assertions, but which ones have nothing behind them? "Evidence check" flags every unsupported claim and says exactly what proof would make it credible.
"Does this actually say what the deadline is?" "Ask this document" answers your question from the text alone, quotes the passage it relied on, and tells you plainly when the answer isn't there.
A bid or grant that must answer specific requirements. Paste the criteria into "Check against criteria" and get a Met / Partial / Missing scorecard with a gaps-to-close list.
The board version. You wrote it for engineers; the board needs plain English. Select the passage, run Re-pitch with the audience set to "a non-technical executive", and it recasts tone, jargon and length, with a diff you approve before a word changes.
Meeting notes → decisions & owners. Messy notes in; a clean record out. Actions returns the decisions actually made and an Action · Owner · Due table, inventing nothing that isn't in the notes.
A post in a voice you choose. Jot the raw idea, select it, and click a Document Leader such as "LinkedIn: Contrarian" or "Article: Storyteller". A prompt, a persona and a model, bound into one tool, turn the line into a finished, on-voice draft right below it, no dialog, no settings. See Document Leaders.
A figure that matches the words. Select a passage and, from the right-click Image group, have the AI generate an illustration that fits, in your chosen house style, dropped straight into the page. See Images.
The thread running through every recipe: saved as a reusable tool · runs inside the document · applies in place · on your keys or a local model. No tab-hopping. No copy-paste. No lock-in.
The prompts we ship are a starting point. The real power is that every one is editable, and you can build a library of document tools tuned to exactly how you work, versioned, categorised and one keystroke away.
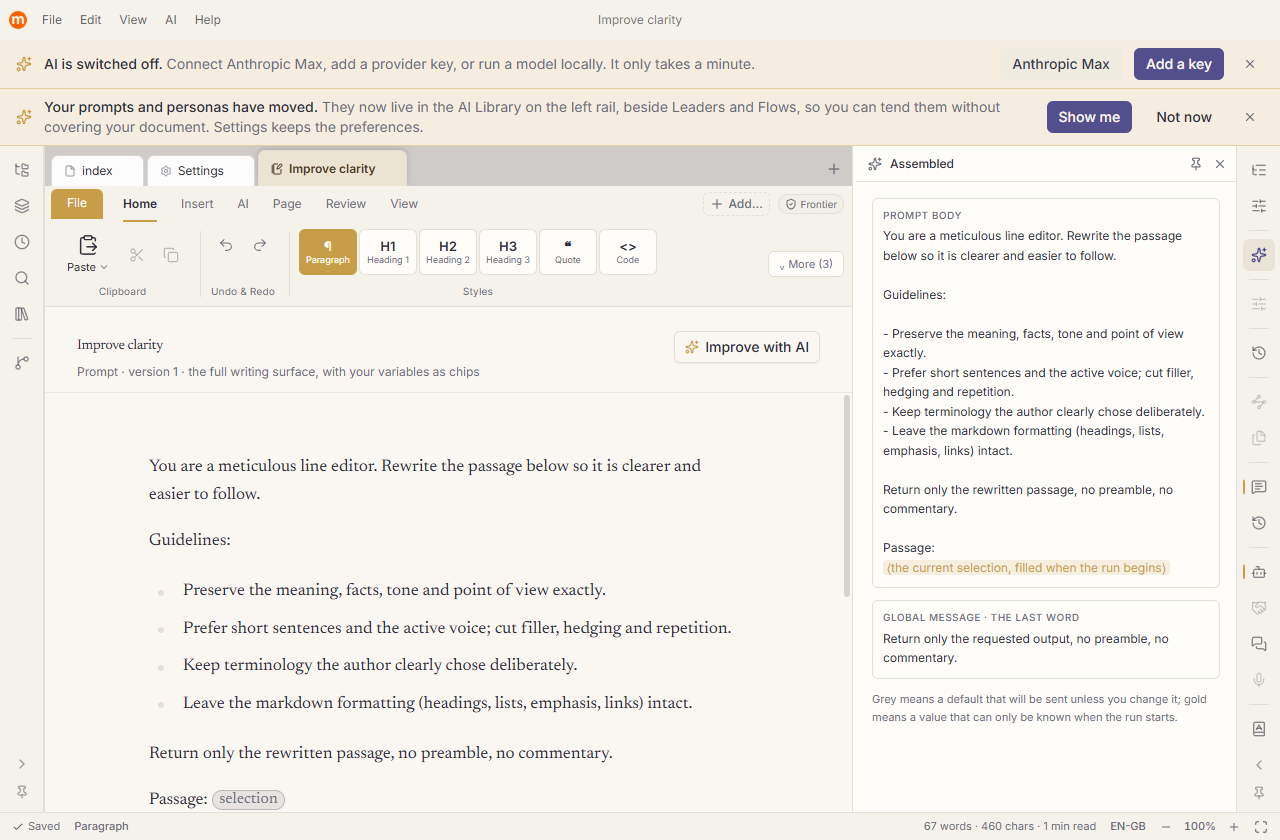
A prompt is a reusable instruction with everything it needs bundled in. The editor gives you:
{{selection}}, {{document}} or {{title}} and Markelangelo fills them from what you're working on.{{audience}} or {{criteria}}. Each is either free text or a fixed set of choices, with a default, and you're asked for it at run time.Every edit to the body or variables is snapshotted. Tuned a prompt too far? Restore any earlier version, and the current one is saved first, so you never lose a good one.
Give a prompt a short nickname and it appears on the editor right-click menu and the ✨ launcher, one click, no dialog.
File prompts into curated groups and filter by them, plus filter pills for nicknamed, on-the-bar and comment prompts, so a big library stays navigable.
Point a heavy analysis prompt at a frontier model and a quick tidy-up at a cheap local one, each prompt picks its own.
A persona captures how a reply should sound, its voice, tone and structure, separately from what a prompt asks for. Each is just a name, a one-line description and an instruction that is added to the system prompt of any run that uses it (describe the manner of delivery, not the task). Write a "sceptical reviewer" or a "warm, plain-English editor" once, attach it to any prompt, or pick it at run time. Markelangelo ships a starter set, the Technical Writer, the Natural Writer, the Plain-English Editor, the Concise Minimalist and the Academic, to build from.
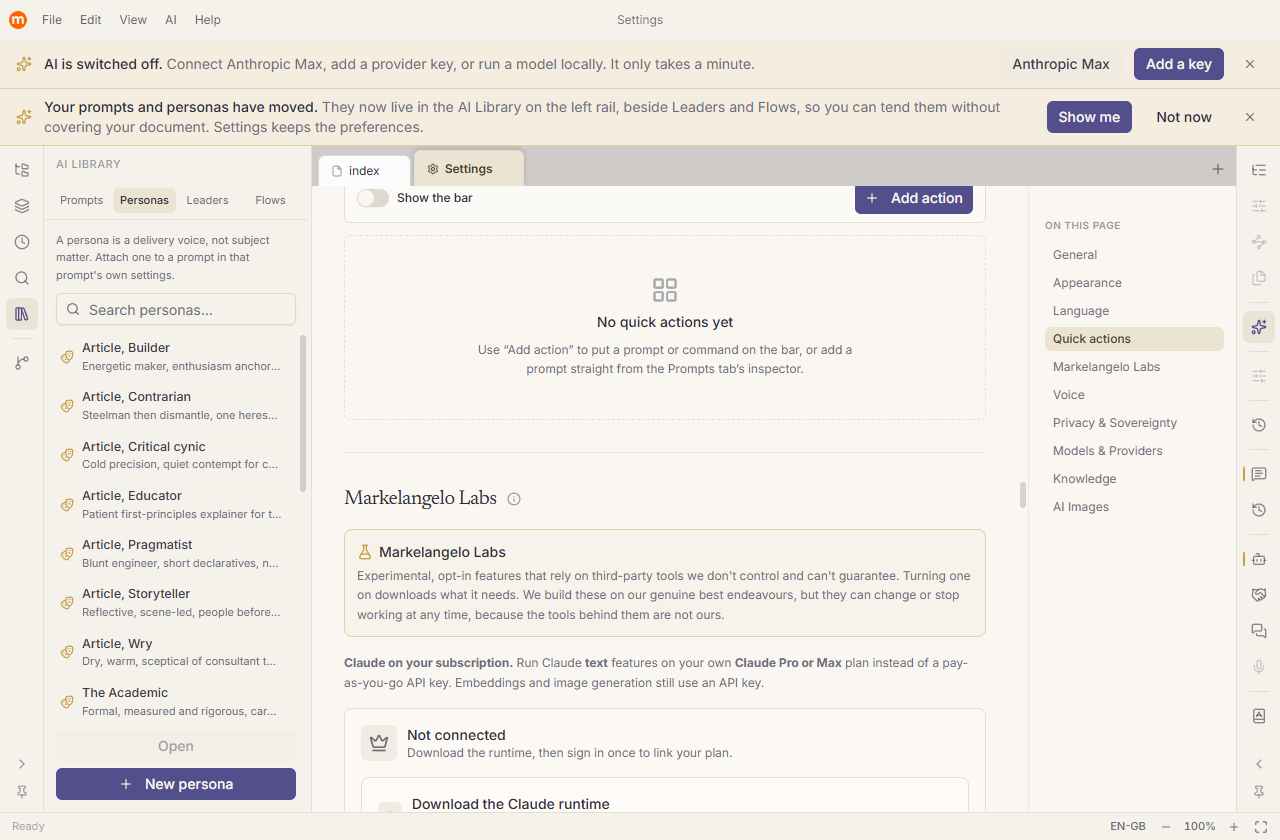
The switchable global message is a single instruction appended to every run. It ships enabled, set to "Return only the requested output, no preamble, no commentary", so you never have to repeat it. Edit it, turn it off, or opt any individual prompt out with its own tick.
The selection rewrites (Improve, Humanise, Shorten, Expand, Fix grammar), the five tones and the document actions (Summarise, Generate outline) are permanent tools, but the instruction behind each one is editable in Settings ▸ Quick Actions, with a Reset to restore the original. That same tab holds the minimum word counts that grey each action out until a selection is long enough to be worth it. See Your document is the workspace.
Put your most-used tools on the Quick Action Bar, a row of one-click buttons (your own icon and colour each) carried in the editor's top toolbar, that run any prompt or command. Between that, nicknames on the right-click menu, the ✨ launcher and Run Prompt (Ctrl+Shift+J), your workshop is always a keystroke away.
When a prompt, a persona and a model always belong together, save them as a Document Leader: one named tool you run in a single click on a selected idea. It is the natural next step once your prompts and personas are in shape. See Document Leaders.
Your best prompts, married to a voice and a model, and run on a single idea with one click.
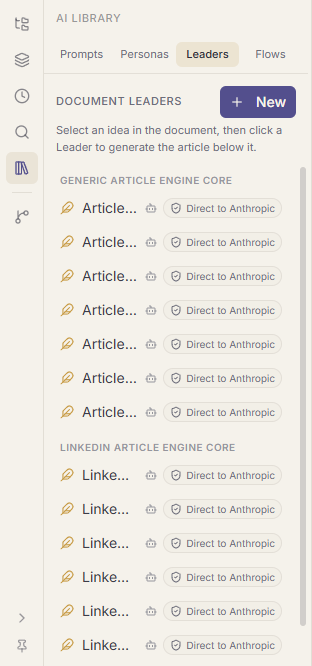
A prompt gives structure. A persona gives voice. A model does the thinking. A Document Leader is all three bound into one named tool, so a whole way of writing becomes a single click. Point one at an idea in your document and it produces the finished piece, in the right shape and the right voice, below the line you selected.
A prompt that lays down the structure, how a LinkedIn article or a long-form piece is built, section by section.
A reusable voice: the Builder is constructive, the Contrarian pushes back, the Storyteller leads with a scene, the Wry one keeps it light.
The two, married, on a chosen model. "LinkedIn: Contrarian" or "Article: Storyteller" becomes one button you press.
Open the Document Leaders tab on the sidebar, select the idea you want written up, and click a Leader. The piece is generated and inserted directly beneath your selection. The same Leaders are on the right-click menu too, so you never have to leave the passage you are working on.
Markelangelo ships two ready-made packs, a generic Article engine and a LinkedIn engine, each with seven personas, so you have fourteen Leaders to try on day one, all running on a frontier model.
Press New and a Leader takes shape from parts you already have:
A Leader is a pure join: it points at those pieces rather than copying them, so improving the underlying prompt or persona quietly improves every Leader that uses it. Edit or delete any Leader from the same tab (hover for the pencil).
Markelangelo is not only a markdown editor. It opens real Word documents and real spreadsheets too, in the same window, with the same AI working inside all three.
Most days you write markdown. But work does not arrive as markdown: a client sends a .docx, an accountant sends an .xlsx, and until now that meant closing your editor and opening something else. Markelangelo opens them where you already are. We call the three Words, Rich Words and Numbers, and the status bar always names the one you are in.
Plain markdown, the surface the rest of this manual describes. Your files stay ordinary .md text on your disk, readable by anything, for ever.
Open any .docx and you land in a proper word processor: a full ribbon, a ruler, real pages that break where Word breaks them, comments and tracked changes. It reads and writes genuine Word files, so what you send is what your client opens.
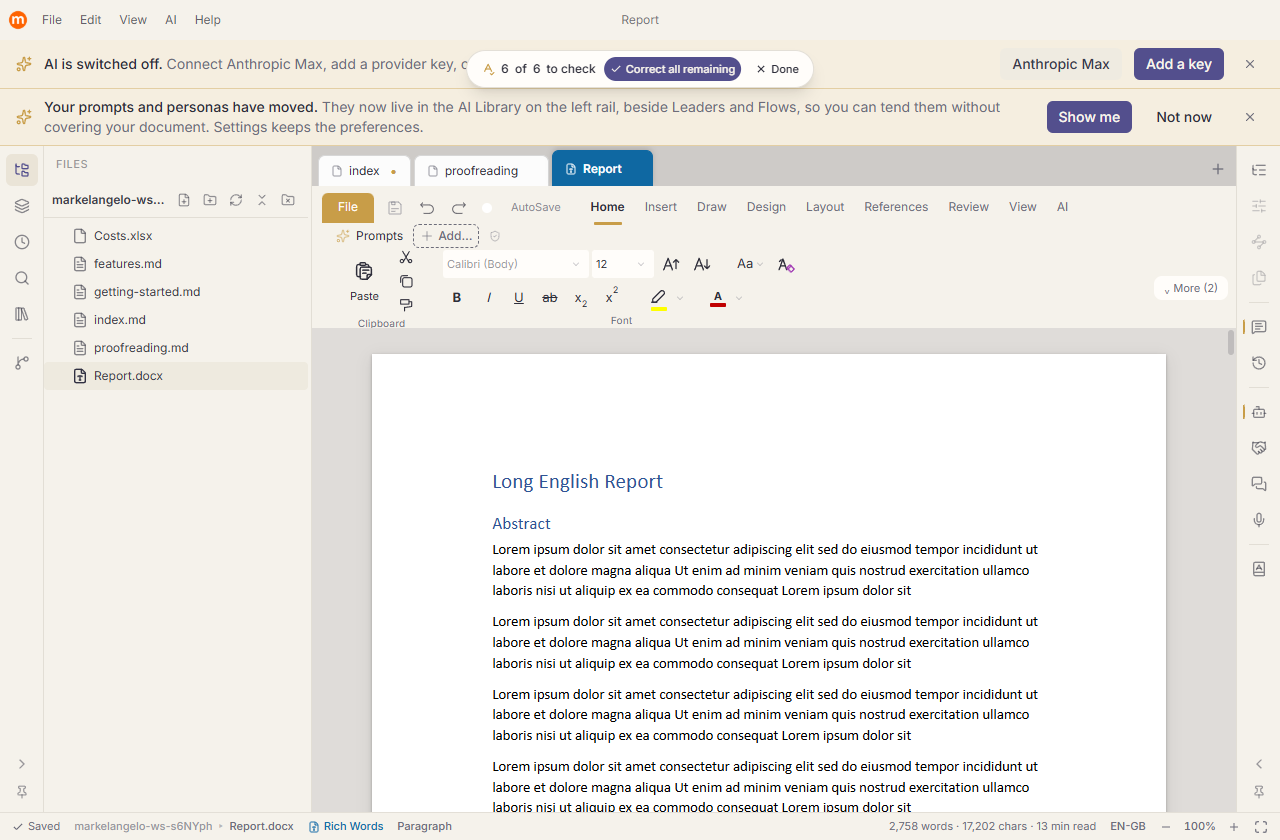
.docx, with pages, a ribbon and the AI tab sitting alongside Word's own.Open an .xlsx and you get a real spreadsheet: formulas, formatting, multiple sheets, the lot. Copy a range here and paste it into a document and you are offered a live link, so the table in your report updates when the workbook does.
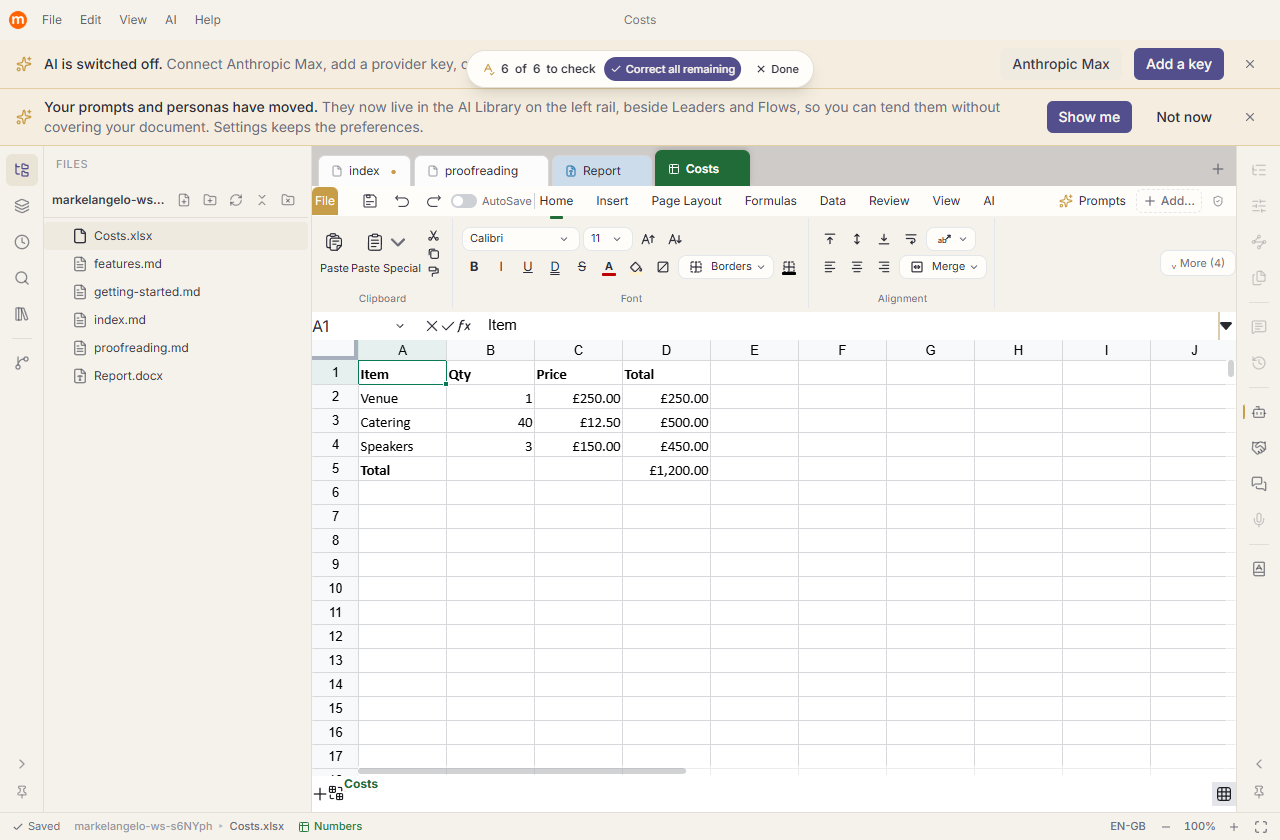
.xlsx, with its own ribbon and formula bar, in the same window as your notes.This is the part that matters. Every prompt, persona and tool you build works on all three worlds, not just markdown. Ask for a rewrite in a Word document and it arrives as a tracked change you can accept or reject. Ask a question of a spreadsheet and the answer lands in the cells, as one undoable step.
Prompts can also be told which worlds they belong to, so a prompt written for spreadsheets does not clutter the menu while you are writing prose.
A markdown document and a Word document can be kept as a pair. Rich Switch makes a .docx beside your .md; MD Switch does the reverse. Neither destroys the other: you end up with both files, sharing a name, and you choose which to work in.
.docx edited here is a .docx anywhere else.A live, distraction-free writing surface where markdown formats itself as you type.
Markelangelo's editor renders your formatting inline, headings, emphasis and lists take shape the moment you write them, so you see the finished look without a separate preview pane. It's plain markdown underneath the whole time.
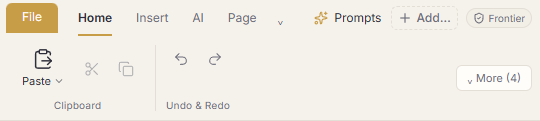
A ribbon sits across the top of every document, in the same place in all three worlds. Six tabs hold the work: Home for the clipboard, undo and redo, styles, the marks you reach for most (bold, italic, strikethrough, inline code), lists and find; Insert for pictures, tables, callouts, links, wiki-links and a table of contents; AI for everything you can ask of a selection, a prompt or the whole document; Page for paper, margins and running headers; Review for spelling and comments; and View for zoom, reading width and the focus modes.
Beside the tabs sit your quick actions, permanent labelled chips you arrange yourself, so the space above your writing does real work. Double-click any tab to fold the ribbon away and get the room back; click it again to bring it out.
Prefer to keep your hands on the keys? Type the familiar markdown and it becomes formatting instantly:
| Type this | You get |
|---|---|
# | A heading (more # for deeper levels) |
- | A bullet list item |
> | A block quote |
**bold** | Bold text |
`code` | Inline code |
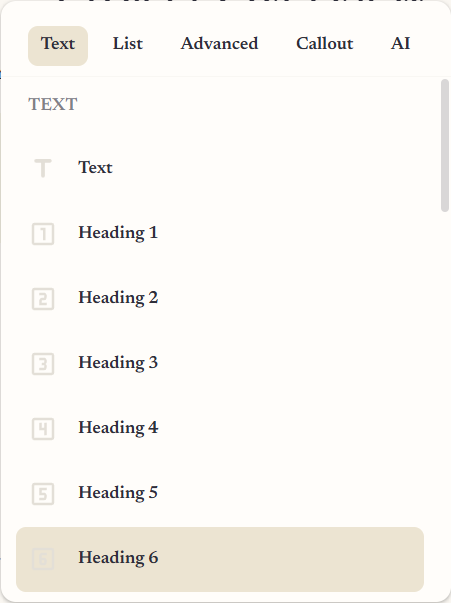
Press / on an empty line to open the slash menu, a searchable list of every block you can insert, from tables and code blocks to callouts and AI actions.
/table or /callout, to jump straight to what you want without scrolling.Select any text and right-click for a two-column command centre: editing, synonyms, comment lenses, your prompts, Document Leaders and images on the left; a column of AI actions on the right. It is the fastest way to reshape a passage without lifting your hands from the work. See Your document is the workspace.
Every block is draggable, hover to the left of any paragraph, list or heading to reveal a handle, then drag it to reorder your document. Beyond the basics, the editor handles the demanding stuff too:
Insert and edit tables visually, with rows and columns you can add or remove as you go.
Fenced code with per-block language selection and syntax-aware preview.
Write mathematical notation that renders crisply inline and in display blocks.
Describe flowcharts and diagrams in text and see them drawn live.
See two documents at once, side by side or stacked, both fully live. Perfect for writing with your notes open, comparing drafts, or lifting material from one piece into another.
Right-click any tab and choose Split Right (or Split Down). That document opens in a second pane beside the one you're in, and both are real editors: type in either, and every AI tool, panel and shortcut works in whichever pane you're focused on.
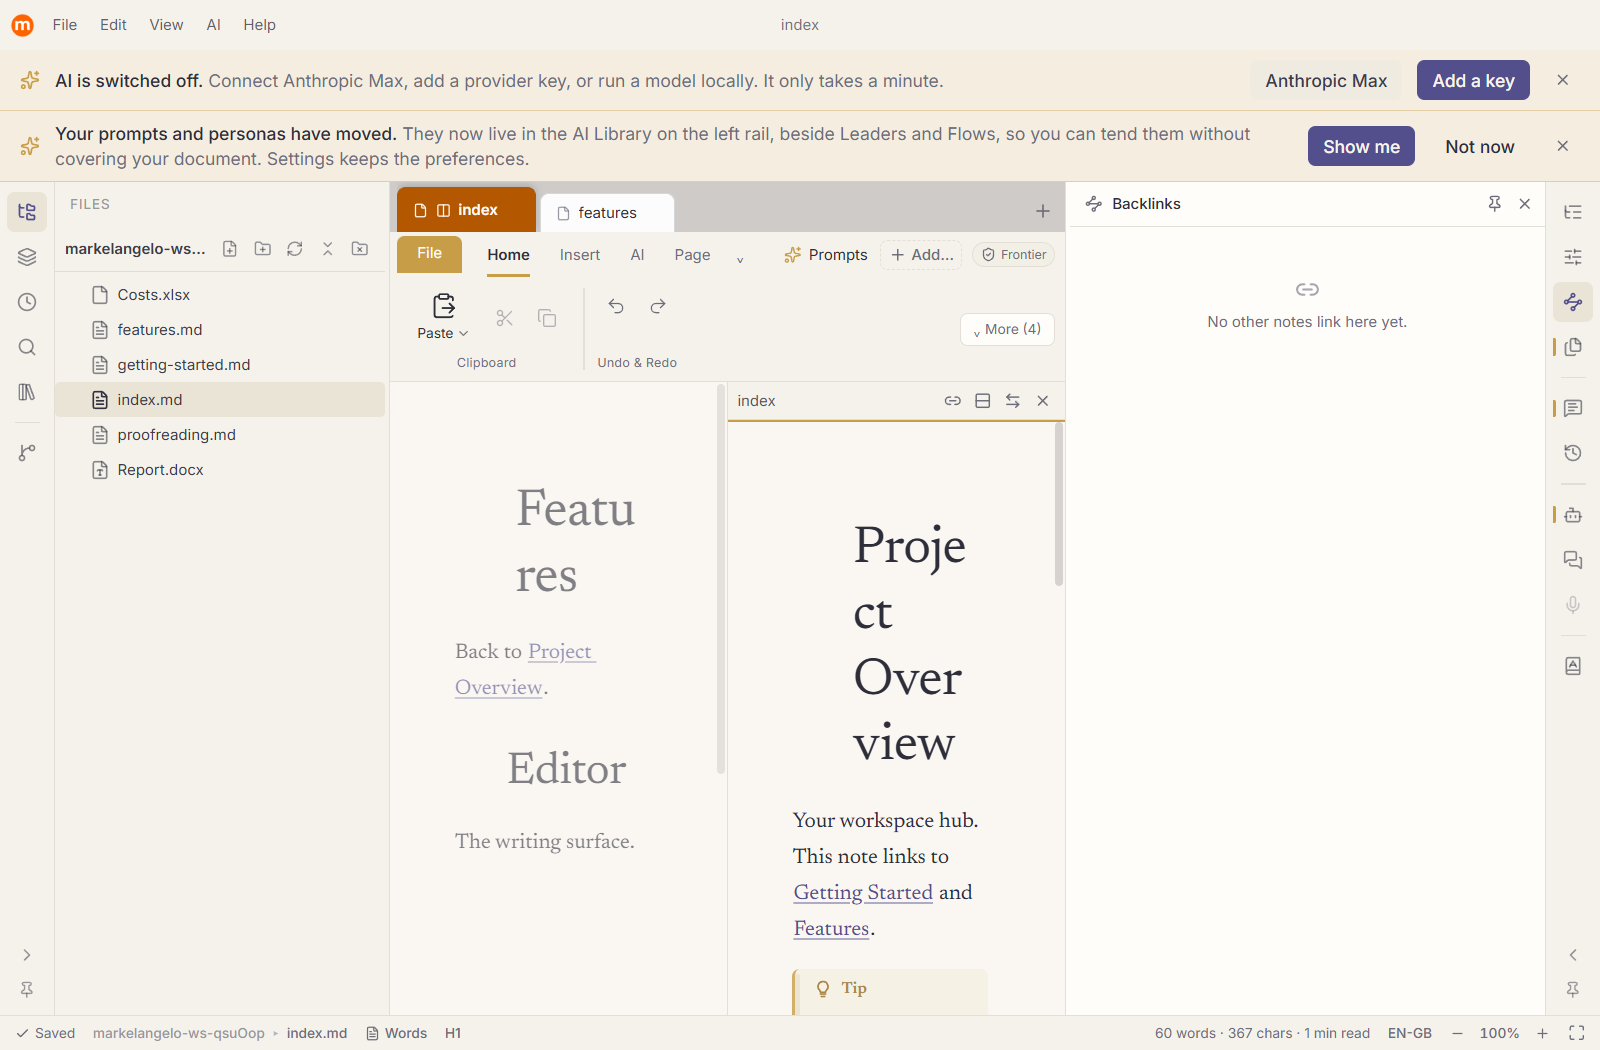
The focused pane carries a fine gold line along its top edge, and the other pane dims very slightly. Click anywhere in a pane to focus it. The outline, properties, statusbar, native menus and every AI action all follow the focused pane, so there's never any doubt about what "this document" means.
The split pane has a slim title bar with four quiet controls:
Drag the divider between the panes to resize them; double-click it to snap back to an even split. Your layout, which documents, which way round, and the divider position, is restored next launch along with the rest of your session.
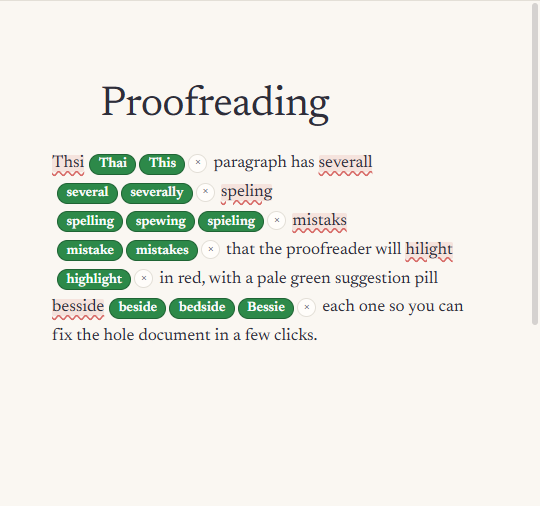
Check the whole document at once, and fix every spelling slip in a few clicks, no right-clicking word by word.
If your spelling is creative at the best of times, correcting a document the usual way is tedious: right-click a red word, read the menu, pick the fix, and do it again, and again. Proofread mode turns that into a single sweep. Run it once and every misspelling in the document is marked at the same time, each with its likeliest corrections offered right beside it.
Draw the eye to what matters with tidy, colour-coded boxes that travel with your file.

Callouts are highlighted panels for notes, tips, warnings and the like, perfect for guidance, caveats and anything a reader shouldn't skim past. Markelangelo gives you five flavours: Note, Tip, Important, Warning and Caution, each with its own colour and icon.
> [!WARNING] on its own line, press Enter, and write the body on the following lines.Both routes produce the same result, so use whichever feels quicker in the flow of writing.
[!WARNING] marker is hidden while you edit for a clean look, but it stays in the saved file. That means your callouts render correctly on GitHub, in Obsidian and anywhere else that speaks the same syntax, fully portable, no lock-in.Fold long documents down to their outline so you can focus on the section in front of you.
Every heading in Markelangelo can be folded. Hover over a heading and a small chevron appears beside it; click the chevron to collapse everything beneath that heading, right up to the next heading of the same or a higher level. Click it again to expand the section back out.
It's a fast way to navigate a big document, collapse the parts you're done with, keep the section you're working on open, and the whole structure stays readable at a glance.
The longer the document, the more this earns its keep. Working through a lengthy report or a sprawling set of notes becomes far less daunting when you can quietly tuck away everything except the part that needs you right now.
Drop a picture in, or generate one from your words, and it's saved right beside your document. Everything stays on your disk.
Adding an existing image is as direct as it should be. You can:
Either way, Markelangelo saves the image into an assets/ folder sitting next to your document and inserts a reference to it at the cursor. Nothing is uploaded and nothing is hosted elsewhere, the picture lives locally, right alongside the words it belongs to.
Need a figure that does not exist yet? The AI can make one, and drop it straight into the page. Select a passage and right-click into the Image group, where three routes wait, each following the same "select, then do" law as the rest of the app.
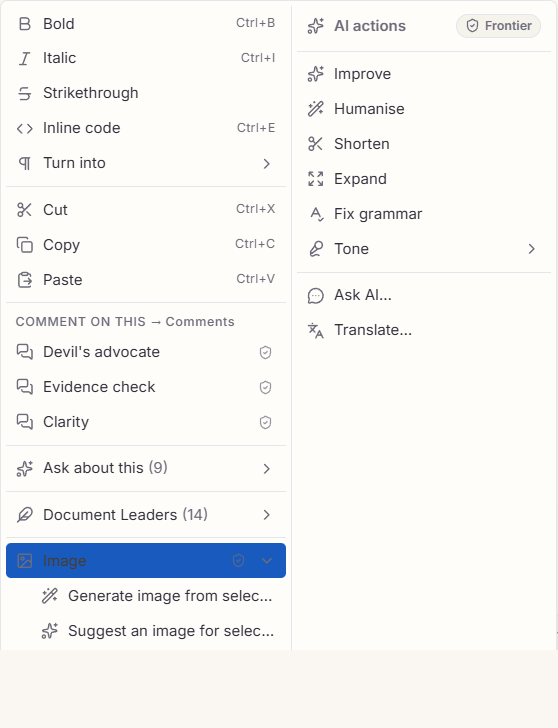
Select some text and ask straight away. The AI reads the passage, generates an image to match, and inserts it below, all in one click.
Not sure what to ask for? Have the AI propose an image prompt from the surrounding text, tweak the wording, then press create.
Already have the picture? Point at a file on disk or a web address and Markelangelo fetches it locally and files it beside your document.
A style library in Settings decides the look, editorial photo, flat vector, watercolour, line art, isometric, or your own. Pick the active style once and every generated image comes out in that voice. Generation runs on your own OpenAI key; the finished picture is saved into the same local assets/ folder as everything else.
assets/ folder beside it, so the whole document folder can be moved or shared as one neat package.See your document's shape at a glance and edit its frontmatter as friendly, typed fields, no YAML wrangling required.
Two panels in the right dock help you keep a long document in order: the Outline shows its structure, and Properties gives you a tidy form for the metadata at the top of the file.
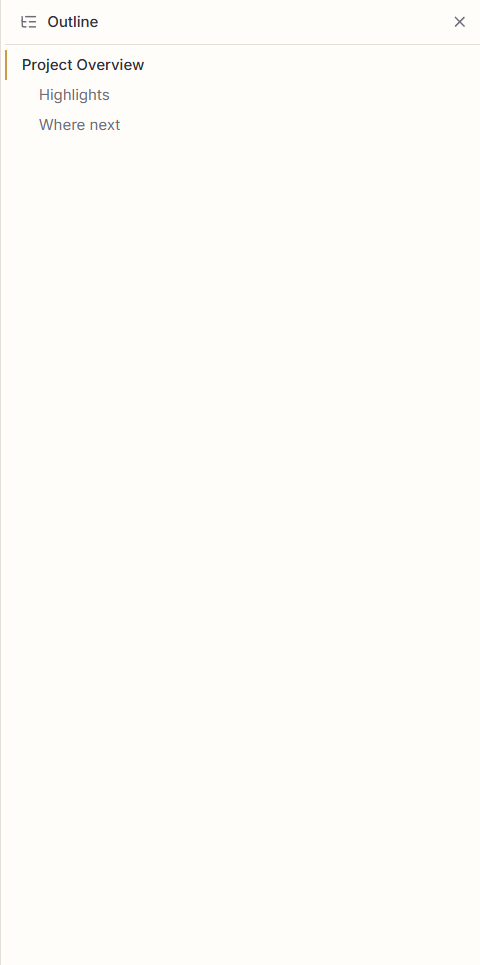
The Outline panel builds a live tree from your headings, nested exactly as they are in the document. It updates as you type, so it always reflects the current shape of your work. Click any heading to jump straight to it, handy for a report or a piece of documentation that runs to dozens of sections.
As you write, the section you're editing is highlighted in the tree, so you always know where you are in a long piece. Think of it as a table of contents you can navigate with, rather than just read.
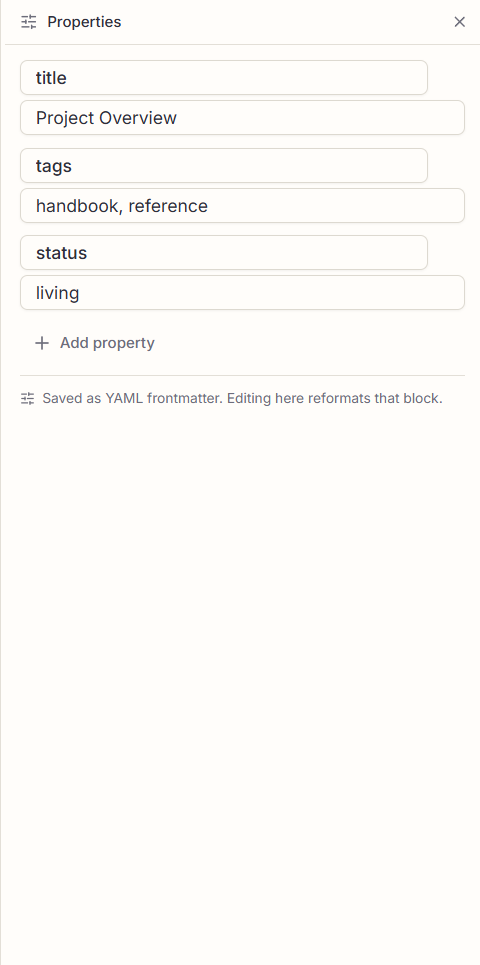
Many markdown documents carry a block of frontmatter at the very top, a small slab of YAML holding the title, tags, a status and whatever else you like. The Properties panel turns that block into a friendly form: each entry becomes a typed field you can edit directly, without touching the raw syntax.
Properties come in the shapes you'd expect:
A single line, a title, an author, a summary. Just type into the field.
A numeric value, edited with a number field so you don't fat-finger a letter in.
A simple toggle for yes/no properties like draft or published.
A list of tags you add and remove one at a time, rather than typing brackets and commas.
You can add a new property or remove one you no longer need, all from the panel. Everything you change is written back as ordinary YAML at the top of the file, nothing proprietary, nothing hidden. Open the same document in any other editor and the frontmatter reads exactly as you'd expect.
Connect your notes into a living web of knowledge, link any document to any other with a pair of brackets, and see every connection flow both ways.
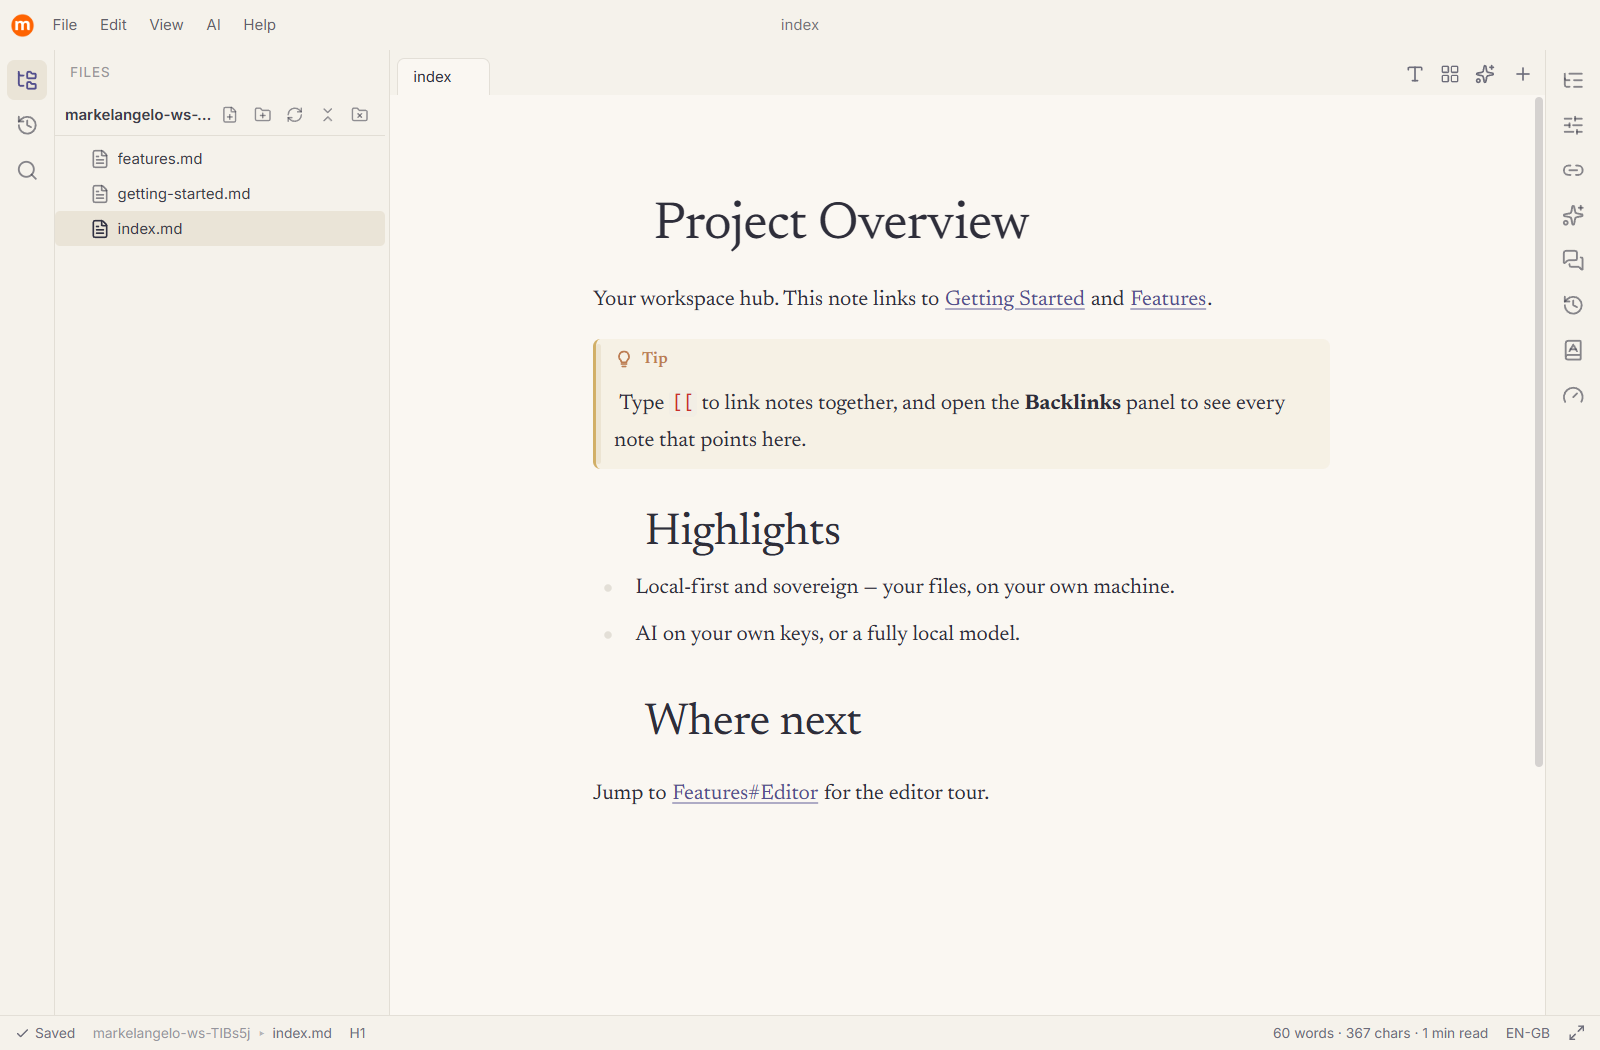
Wiki-links are the heart of turning a folder of markdown files into a knowledge base. Instead of hunting for the right file every time you want to reference it, you simply write its name in double brackets, [[note]], and Markelangelo weaves the connection for you. It's the fastest way we know to manage all your project documentation as one interlinked, navigable whole.
Type [[ anywhere in your document and an autocomplete list of every note in your workspace appears. Keep typing to filter it, then choose the note you want:
Once a link is in place, click it to open that note. If the note doesn't exist yet, clicking the link creates it for you on the spot, so you can link forward to a document you haven't written, then fill it in later. Your ideas lead; the files follow.
Two small flourishes make links do exactly what you mean:
| Syntax | What it does |
|---|---|
[[note]] | Links to another note in your workspace. |
[[note#heading]] | Jumps straight to a particular heading inside that note. |
[[note|alias]] | Shows friendly display text while still linking to note. |
In the editor, the brackets tuck themselves away so your prose reads cleanly, but they stay in the underlying file. That means your links are portable: open the same folder in Obsidian, or any other tool that speaks wiki-links, and everything still resolves.
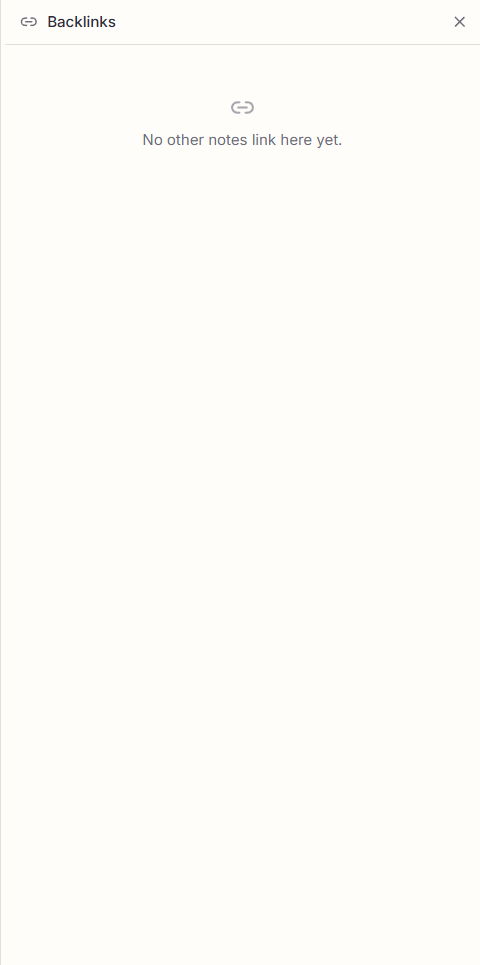
A link only tells half the story: it points outward. The Backlinks panel in the right dock tells you the other half, every note in your workspace that links to the document you're currently reading. Follow those threads and the whole shape of your project reveals itself: which ideas reference this one, where a topic is discussed, how it all hangs together. It's the difference between a pile of files and a genuine, navigable web of project documentation.
[[ and start typing the name of another note.Every tool you need lives one click away down the edges, open a panel when you want it, tuck it away when you don't.
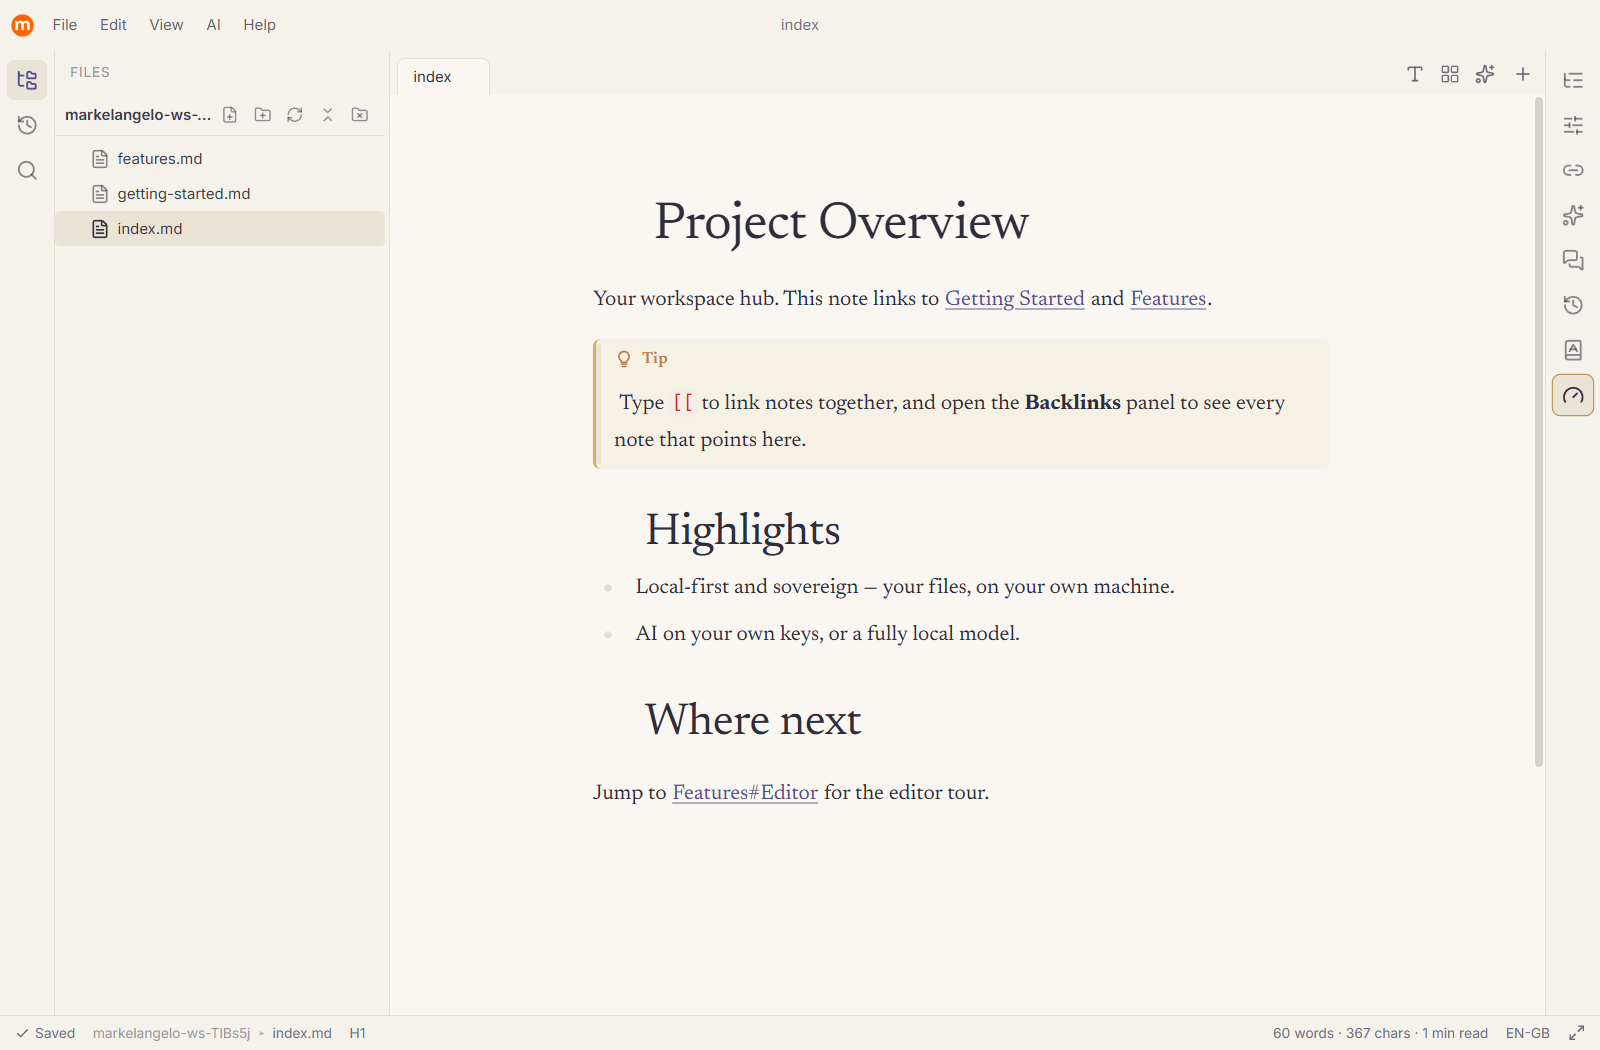
Markelangelo keeps its working tools on two slim icon rails, one down each edge of the window. The left rail switches the sidebar (files, search, recents, prompts, Document Leaders); the right rail is the dock, where self-contained panels open and close independently, so your writing surface stays as clear or as busy as you like.
A live tree of your headings, click to jump anywhere in a long document.
Your document's frontmatter as friendly typed fields.
Every AI comment on the document, grouped and ready to resolve. See AI comments.
Every note that links to the one you're reading.
The AI workspace, run prompts, personas and actions on your document.
Ask questions across your workspace and get answers grounded in your own notes.
Local snapshots of a document you can browse and restore.
The bundled 140k-entry thesaurus, right beside your writing.
A running tally of your AI usage and cost.

Each rail is a persistent strip of icons. Click one to open its panel or sidebar; click it again to close. Because the rail never goes away, a closed panel is always exactly one click from reappearing, no menus to dig through, no state to remember.
Icons are compact, but not always obvious at a glance. A chevron at the foot of each rail expands it to show the text name beside every icon, so you can read exactly what each one does. It works on both rails, left and right. When you want the labels to stay, click the pin beside the chevron and the rail keeps them open across restarts.
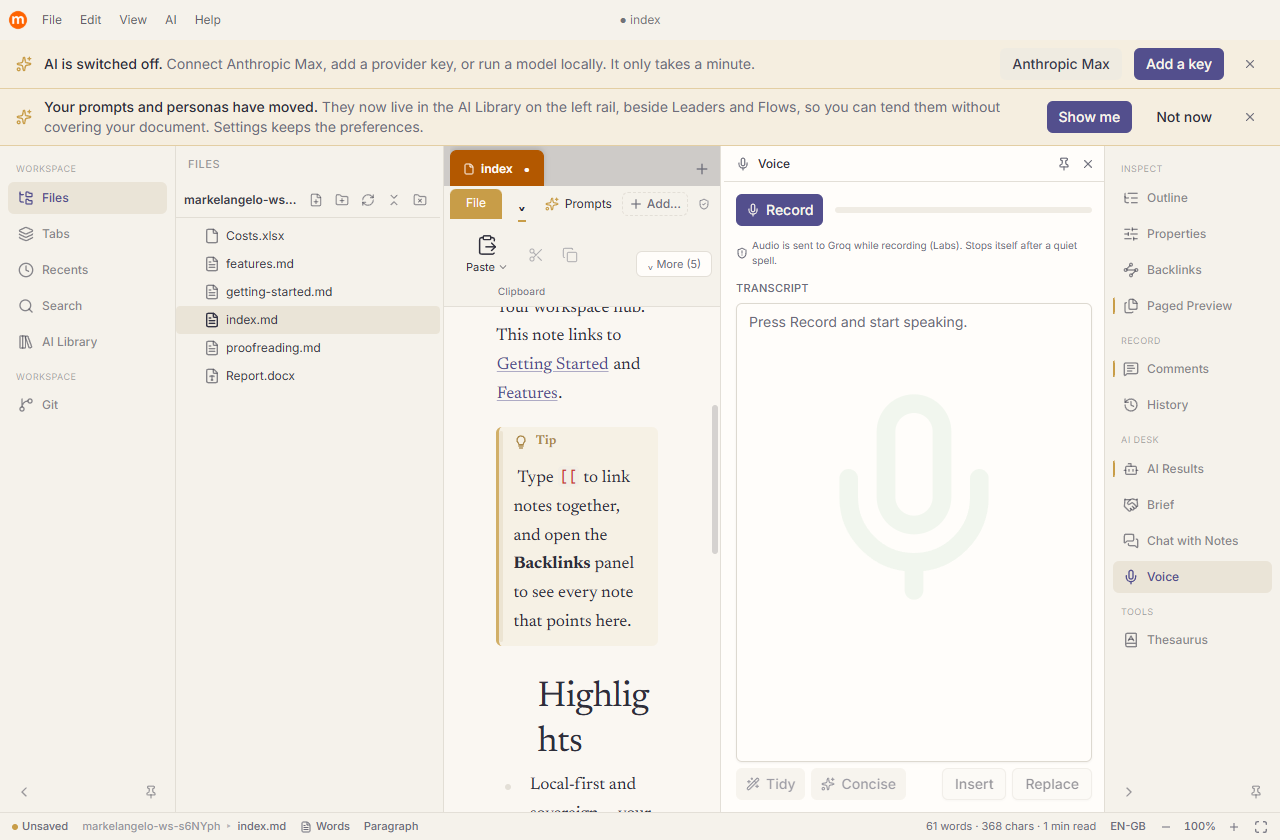
This keeps the interface out of your way when you're writing and instantly legible when you're not. Open just the Outline while drafting; add Backlinks when you're linking notes together; bring up the AI panel when you want a hand, then close them all and enjoy a clean canvas.
Reach any command, jump to any file, and fire your favourite prompts, all without leaving the keyboard.
Markelangelo is built to be driven fast. Whether you know exactly what you want or you're hunting for it by name, there's a keystroke that gets you there in a second.
Press Ctrl+Shift+P to open the command palette: a searchable list of every command in the app. Start typing what you want to do, toggle a panel, switch a theme, run an export, enter Zen mode, and the list narrows as you go. Choose a result and it runs. It's the single fastest way to reach any corner of Markelangelo, and it means you never have to memorise a keyboard shortcut you use only now and then.
When you know the document you want, press Ctrl+P for Go to file. Type a few characters of a file's name and a fuzzy search finds it across your workspace, no need to remember which folder it's in or type the name in full. Hit Enter to open it. In a big documentation set, this is how you move between notes in the blink of an eye.
The quick action bar is a row of your own one-click buttons, carried in the editor's top toolbar beside the built-in formatting controls. Each button carries its own icon and colour, and runs whatever you assign to it, any prompt from your library or any command in the app. Build up a row of the actions you reach for most, and your day-to-day workflow becomes a single click.
Nothing is hidden and nothing is hard-wired. Every behaviour, from autosave to the exact model behind each feature, is yours to set, in one place.
Open with Ctrl+, or File ▸ Settings. The Settings Shop is a full-width, non-modal workspace that leaves your document running underneath, so you can tune a prompt and see the effect without closing anything — and it now holds every preference in the app on a single rail.
The General section holds the everyday behaviours:
| Setting | What it does | Default |
|---|---|---|
| Restore previous session on launch | Reopen the tabs and folder you had open last time. | On |
| Autosave | Write changes to disk automatically while you type. | Off |
| Autosave delay | How long to wait after you stop typing before saving (0.5 to 5 seconds). | 1.5 s |
| Daily word goal | Shown as a gold ring in the status bar. Set to 0 to switch it off. | 0 (off) |
Shape the app around your eyes and your mood, pick a theme, tune the typography down to the character, and strip everything back when you just want to write.
Markelangelo is a place you'll spend hours, so it's built to feel right for you. Everything here lives in Settings ▸ Appearance (Ctrl+,), from the overall theme down to the width of a line of prose.
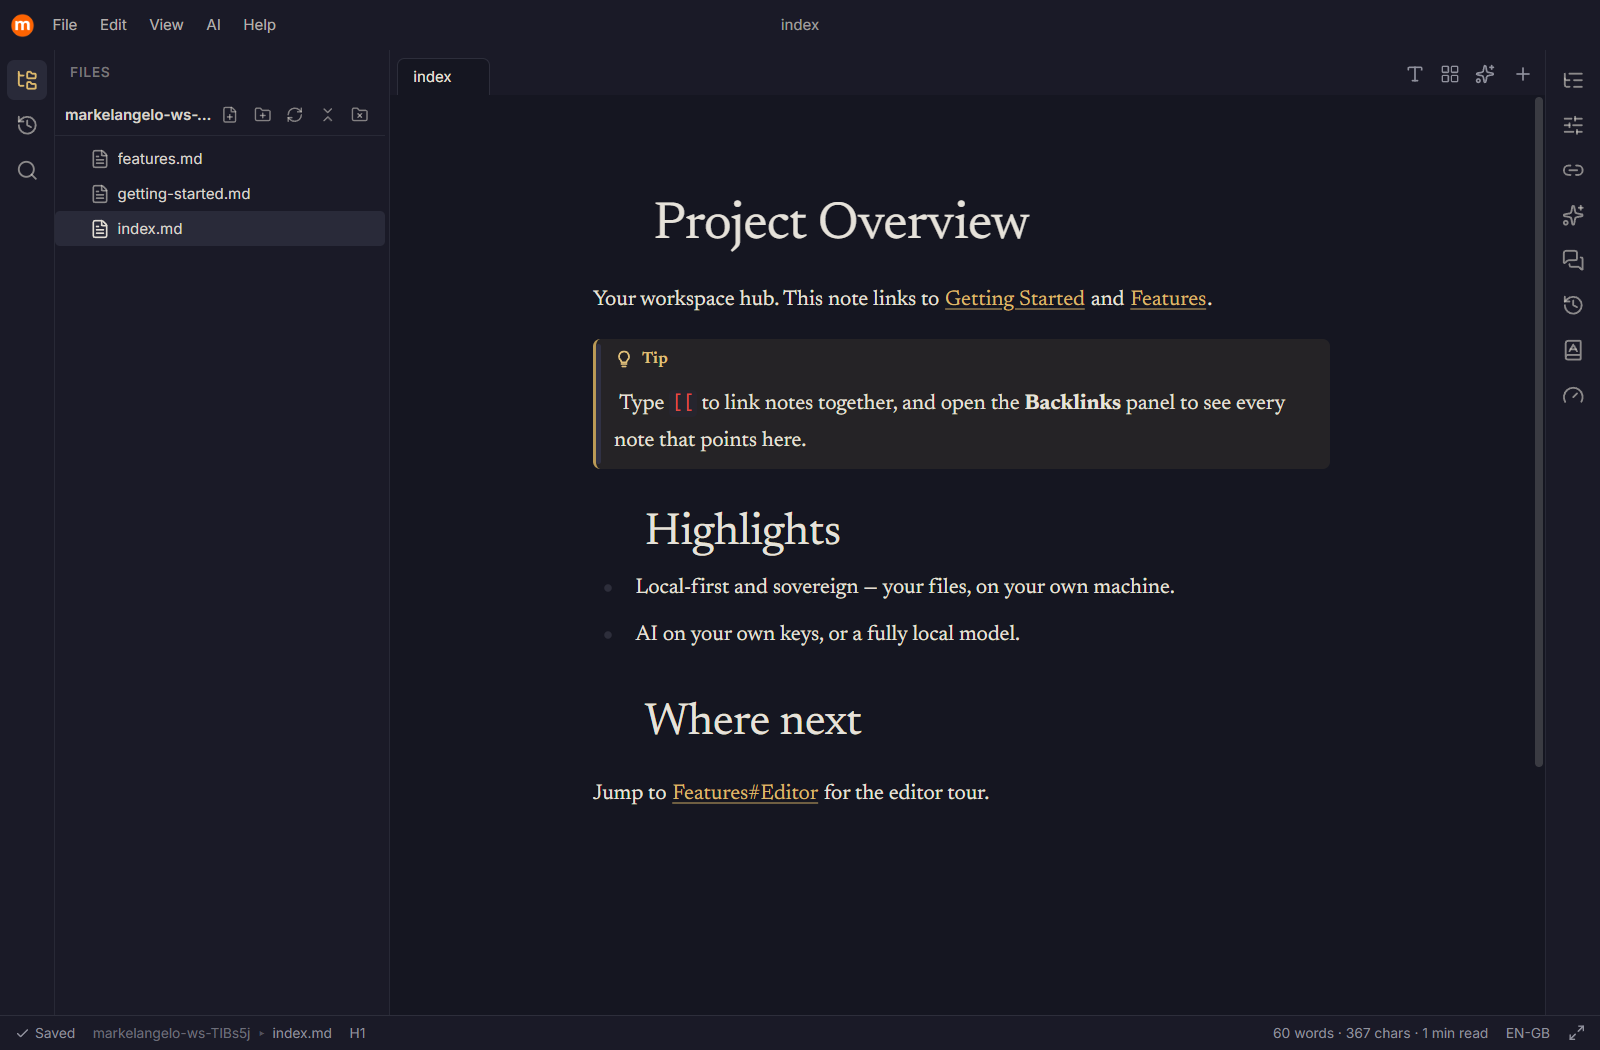
Turn on Follow system and Markelangelo tracks your operating system's light and dark preference automatically. Or choose one of three hand-tuned themes yourself:
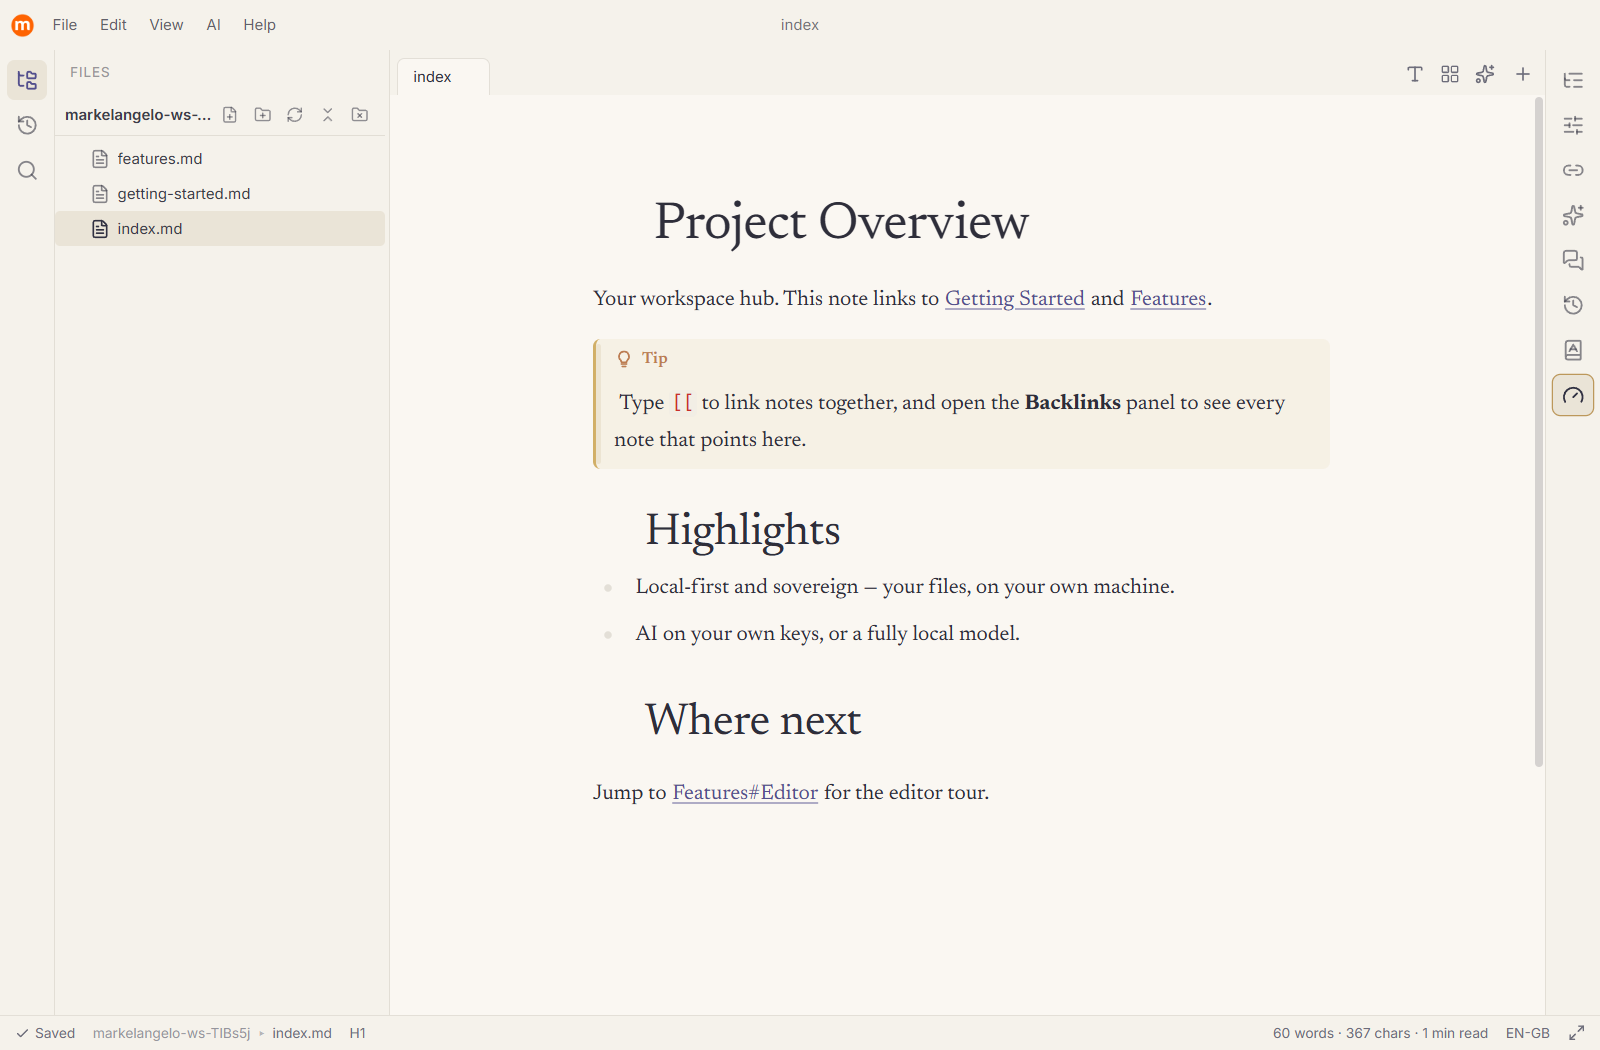
Warm ivory and gilded ink. The default reading room, a classical light theme.
A deep indigo night. A calm dark theme for low light and late hours.
Aged paper and oak. A soft, book-ish light palette with a gentle feel.
The Typography Studio puts the finer details of your prose in your hands, with a live preview that updates as you drag. Start with a font pairing:
Inter, a clean, contemporary sans-serif.
Newsreader, a refined serif. The default.
Lora, a warm, calligraphic serif.
Geist, a precise, engineered sans.
Then dial in the reading experience with four sliders and a toggle:
| Control | Range | Default |
|---|---|---|
| Size | 14 to 22 px | 17 px |
| Line height | 1.40 to 2.00 | 1.70 |
| Measure (line width) | 50 to 100 ch | 72 ch |
| Paragraph spacing | 0.5× to 2× | 1× |
| Justified text | on / off | off |
Small changes here make a real difference over a long session; a Reset typography button restores the defaults whenever you want a clean slate.
When you want the world to fall away, three writing modes clear the decks:
Need the text a little larger or smaller for the moment? Zoom the document with Ctrl+= and Ctrl+- (or Ctrl and the scroll wheel), anywhere from 70% to 200%, and Ctrl+0 to snap back to 100%. It scales the document, not the chrome, handy for presenting on a big screen or squeezing more onto a small one.
Write in the language you think in, with a dictionary that learns your words and a thesaurus that never needs the internet.
Everything here lives in Settings ▸ Language (Ctrl+,). Markelangelo separates two kinds of spelling help: the live underline as you type, and a whole-document Proofread sweep. Both draw on the settings below.
Choose up to five languages to check at once, so a bilingual document is underlined correctly throughout. British English is enabled by default and pinned to the top of the list; the full set on offer comes from your operating system, with names shown in plain form (British English, American English, and so on) beside their language code.
Names, jargon and coinages that are not "wrong" just need adding once. Type them into your personal dictionary, or right-click any underlined word and choose Add to dictionary, and they stop being flagged everywhere, in every document.
Reach for a better word without leaving the page. Synonym lookups use a WordNet-derived dataset of around 140,000 entries, bundled with the app and entirely offline. Open it from the right-click menu on a word, the Thesaurus dock panel, or the "Look Up Synonyms" command (Ctrl+Shift+Y).
When you want to fix a whole document at once rather than word by word, Proofread mode (F7) checks the lot in a single pass and offers one-click corrections. It runs against a bundled British-English dictionary on your own machine. See Proofread mode.
There is no Markelangelo AI account and no middleman. You connect a provider you already pay for, or a model running on your own machine, and your keys stay encrypted on your disk.
Everything here lives in Settings ▸ Keys & connections (the palette door is Keys & Connections…). It holds the connections and the keys only: the models themselves live next door in Model Management, under the stance that governs them. Three built-in providers are ready to connect, and you can add your own.
Claude models (Opus, Sonnet, Haiku and more), on your Anthropic key.
GPT models and the embedding models that power semantic search, on your OpenAI key.
One key, hundreds of models across providers, and the routing that drives the sovereignty stances.
Any OpenAI-compatible server, add it by name and base URL. This is how local models connect.
The three built-in providers cannot be removed, only disabled. Any additional OpenAI-compatible endpoint can be added yourself.
On a provider's card, choose Set key and paste your API key. It is encrypted with your operating system's secure storage (Keychain, DPAPI or libsecret) and stored on your machine only. It is never synced and never logged, and the app itself only ever holds the last four characters to show you; the full key stays in the vault and goes straight to the provider when you run a request. Each card also offers Replace key, Clear, and Test & refresh, which verifies the connection and pulls the provider's live list of models. Each card shows how long since that list was last refreshed, and once it has been a while a gentle prompt suggests refreshing, because model names are chosen by the providers and change over time, not by Markelangelo.
Prefer nothing to leave your machine? Run a model server locally and point Markelangelo at it. One-click presets set up Ollama (http://localhost:11434/v1) and LM Studio (http://localhost:1234/v1) for you; a local endpoint needs no key, no account and no bill. Install one, pull a model, and select it.
Each provider carries a catalogue of models with an editable label, context window, maximum output and price per million tokens in and out. Built-in models can be relabelled and repriced; you can add models by id too. The pricing you set here is what drives the cost meter, so keeping it current keeps your Usage figures honest.
In the Defaults tab you choose the model behind each kind of work, so a quick tidy-up can run on something cheap and fast while long-form drafting reaches for a frontier model:
| Feature | What it drives |
|---|---|
| Quick actions | The selection rewrites: Improve, Shorten, change tone and the rest. |
| Prompt runs | Your prompt library and free-hand instructions. |
| Document actions | Summarise, outline and table-of-contents generation. |
| Chat with notes | Conversational answers grounded in your indexed notes. |
| Semantic index | The embeddings that power search and chat (needs an embedding-capable model). |
Any prompt or Document Leader can also override its own model, so the default is only ever a sensible starting point.
Experimental, opt-in features that lean on third-party tools. The first inhabitant: run Claude on your own subscription instead of an API key.
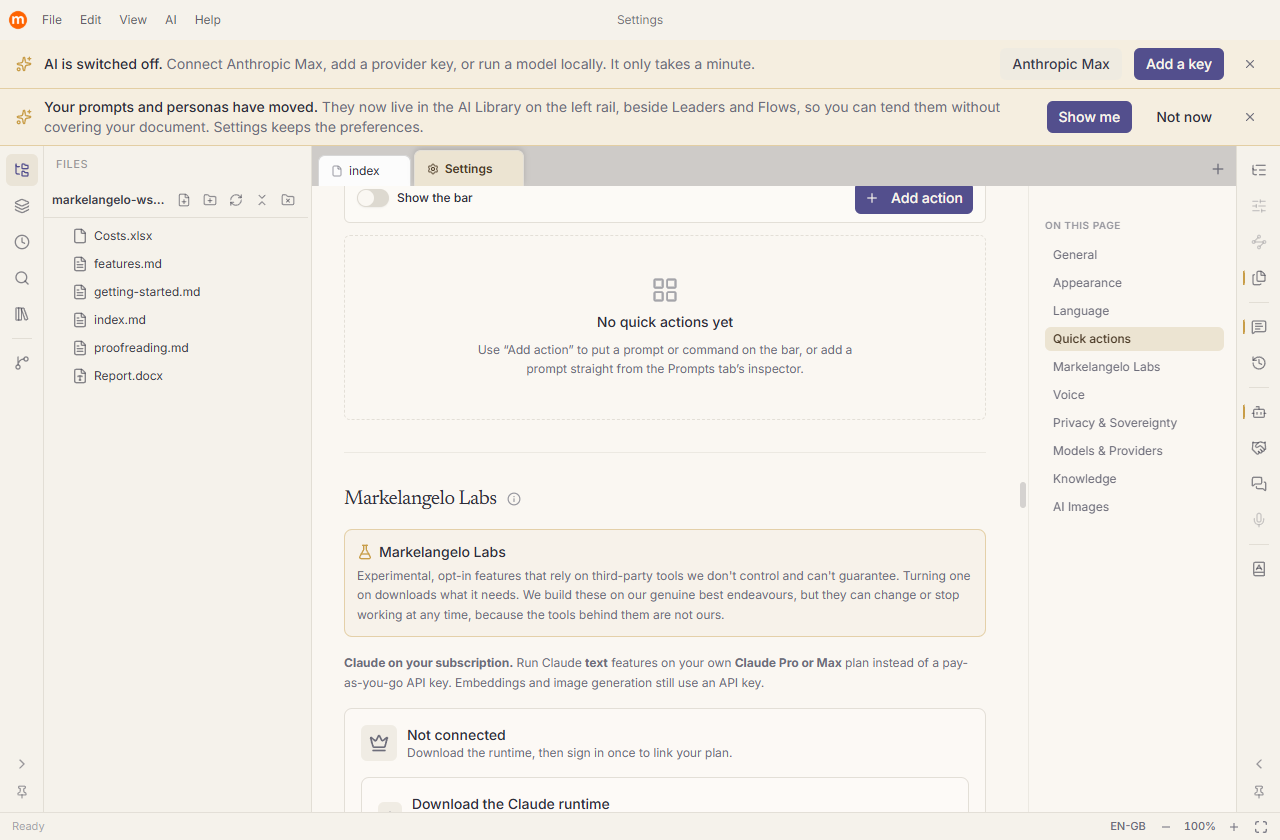
If you already pay for a Claude subscription, Labs lets Markelangelo's text features run on it, no pay-as-you-go key needed. Three steps, all inside the app:
One click decides how far your words are allowed to travel. Everything that follows, the models on offer, the defaults each feature uses, and every run in the app, already agrees with it.
Settings ▸ Privacy & Sovereignty is one room with one job: you pick a stance, and from that moment the app is already right. There is no second set of switches to keep in step, and nothing quietly steps outside your choice to be helpful.
A stance is not a flag on a setting. It is a list of models, worked out from live data: what OpenRouter publishes about its providers and their retention policies, what your own machine is running, and which of your own keys are set. Four of the five stances are locked, which means the list is the list. You choose your defaults from it, and you can neither add to it nor hide anything in it.
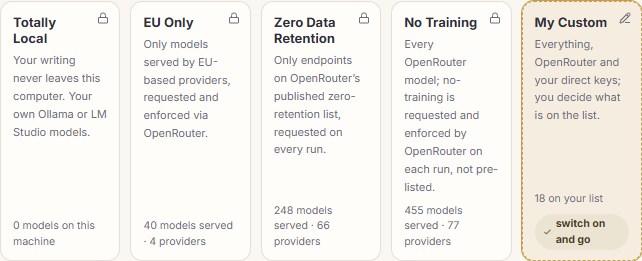
Your writing never leaves this computer. It runs on your own Ollama or LM Studio models. You need one running, and quality and speed are your hardware's.
Only models served by providers headquartered in the EU, requested and enforced via OpenRouter. A smaller set of models, handled by those providers under their own policies.
Only endpoints on OpenRouter's published zero-retention list, requested on every run. Fewer models again.
Every OpenRouter model, with no-training requested and enforced by OpenRouter on each run rather than pre-listed. Providers may keep short-term logs for abuse monitoring under their own policies, so this is not the same as zero retention.
The one open stance: everything OpenRouter can reach and your own direct keys, each model wearing its own attribute, and you decide what is on the list. It opens with the Best available template already on, so a first-time user still gets our recommended set in one click.
Direct keys and an Anthropic Max subscription exist under My Custom and nowhere else. That is why there is no "run anyway" anywhere in the app, and nothing to consent to: under a locked stance there is no outside-the-stance run to permit. The only way out of a locked stance is to choose My Custom, which is a deliberate, visible act.
Under the cards sits Seats. A seat is the job a model does: Writing (prompts, quick actions, document actions, the Conversational writer, Map Expand, Build it), Quick (the Conversational interviewer, which needs structured answers), Vision (reads pictures and charts), Images (makes pictures), Knowledge index (the embeddings behind chat-with-notes) and Voice (dictation).
Every seat shows what it will use, and you change it from the served list. Nothing else is offered. Each stance keeps its own seat choices, so switching stance swaps the whole set and switching back restores exactly what you had. The active card carries a small pill that says switch on and go when every seat already has a compliant choice, and "2 seats need a choice" when they do not.
Settings ▸ Model Management is the models environment, straight after the stance that governs it. Under a locked stance it is read-only and says so: you are looking at every model that stance serves, with where your text goes, what each can do, its price per million tokens, its context window, its health and its lifecycle. Under My Custom it becomes yours to build.
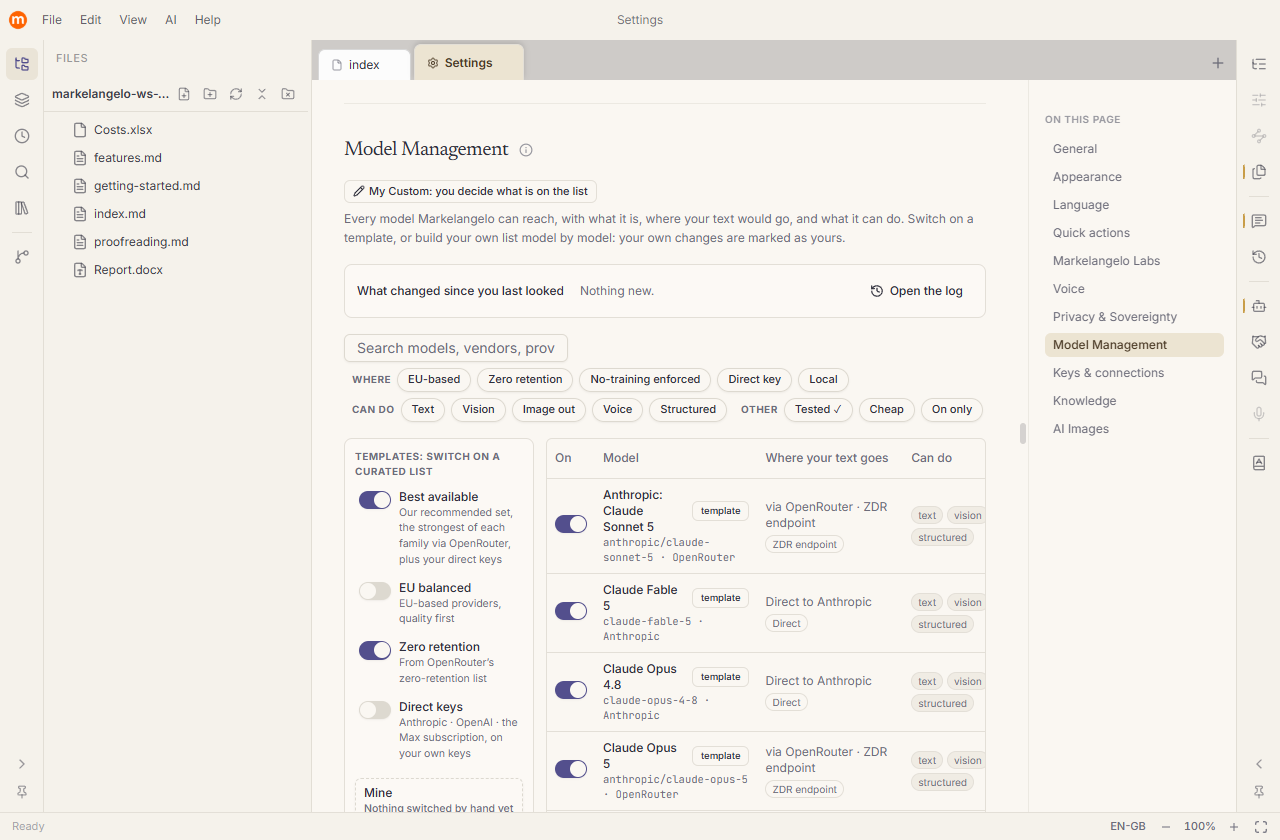
Wherever a model is chosen it is the same picker: the Run Prompt override, a prompt's own model and its two Conversational seats, a Leader's model, a Flow node, Retry on another model, the seat defaults on the stance page, and the repair on a stopped run.
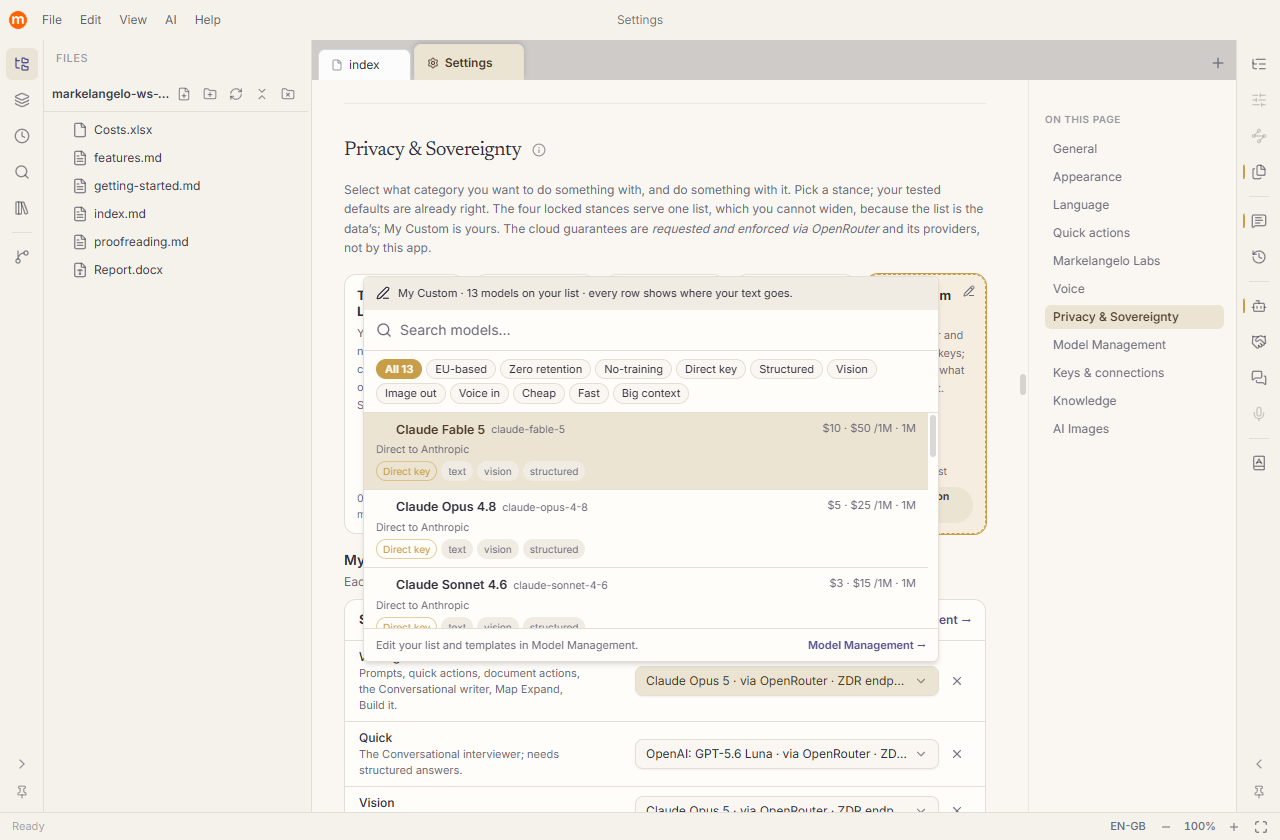
A model you pinned that your stance does not serve is shown on the trigger in gild, marked not served, rather than hidden. Hiding it would be the silent substitution this whole design exists to end.
Beside every control that fires a run sits a small model chip naming the model and its attribute: "Mistral Large · EU-based · Mistral (FR)", or "Claude Opus 5 · Direct to Anthropic". A run on your Anthropic Max subscription says "Direct to Anthropic (your Max subscription)".
The chip asks the same resolver the run itself will ask, so it cannot claim a model or a route the run did not take. When the seat cannot be served, the chip turns gild and carries the sentence in its tooltip. In dense lists and menus it shrinks to an icon and the words move to the tooltip, so every option in a list still tells you where it would go before you pick it.
If the model a run would use is not served, the run stops. It is never swapped for something else, and you are never asked to make an exception. The sentence is always the same shape and always ends the same way:
"Nothing was sent" is the point: you never have to wonder whether the words went anywhere while the app worked out that they should not have. The other reasons speak just as plainly: a model that has vanished from the stance's list, one that has reached its end date, one whose providers are down or degraded, one that cannot do the job, a provider you switched off, or a missing key.
There are three ways out, and no fourth: pick a served model from the picker in the door (which runs this one thing and leaves everything else alone), switch stance (or "Choose a model", or "Add a key", whichever the reason calls for), or Not now. Where the run was fired from a panel rather than a button, the same sentence and the same three doors appear under the control you pressed, not behind a dialog covering the thing you are trying to repair.
Model lists move. Providers move country, endpoints go dark, models are retired, better ones arrive. A background watcher reads OpenRouter's lists daily and turns what changed into sentences, in our words rather than an event log.
That last one is the family line, one line beneath the picker wherever a model is pinned. It informs and never moves. Try it changes this one control and nothing else. Switch everywhere shows every place the old model is chosen, lets you tick the ones to move, and repoints them in one go, so nobody is left half-upgraded; it only ever offers seats your stance would still serve afterwards. Not now is remembered for that pair and never asked again.
Everything the watcher raises collects in the watch bar at the top of Model Management: only what you have not seen, each row a sentence you can act on, with Open the log for the whole history and Mark all seen to empty it. The loudest row, the one about a model something of yours points at, is also raised as an alarm on the stance card and the Seats panel, where the choice was made.
So Markelangelo states the constraint, OpenRouter applies it against its partner providers, and you can read the detail in OpenRouter's own sovereign-AI documentation. Totally Local needs none of this: there is no network call to route.
The stance you select decides how much of your text may leave your machine, from none at all on Totally Local to the fewest limits on My Custom. Choosing a more open stance is a deliberate decision to share more in exchange for capability. It is never done behind your back, and the app shows you plainly what each stance does and does not promise before you apply it.
Please be clear-eyed about the limits of anyone's control. On the cloud stances we send the strongest routing controls available to us and OpenRouter applies them against its partners, but the actual handling of your text is performed by third parties, OpenRouter and the model providers, under their own policies. "EU Only" means providers headquartered in the EU; OpenRouter's guaranteed in-region processing is a separate enterprise service we do not claim. My Custom attaches no routing controls at all: each model wears its own attributes and your text is handled under each provider's own policies. Those policies, and any guarantees in them, are theirs and not warranties given by Markelangelo, and we do not control, operate or audit those services. Even a model you run locally is third-party software we did not write and cannot fully control.
We give our genuine best endeavours to honour every stance faithfully and to route your requests exactly as the stance describes. We cannot, and do not, guarantee that a third party will adhere to its own stated policy. You are responsible for choosing a stance suited to the sensitivity of your material; if in any doubt, Totally Local shares nothing. This guide is not legal advice, and it does not replace the terms of the providers you use.
None of this is a hedge around the intent, it is the intent: the choice sits in your hands, deliberately. Pick the strictest stance you are comfortable working within, and you never have to wonder where your words went.
Every AI run is metered the moment it happens, so you always know exactly what your workshop is costing you, broken down by model and by feature.
Markelangelo records each run: the model, the feature, the tokens in and out, and the estimated cost from the pricing in your model catalogue. It all stays on your machine. You can read it two ways: the Usage dock panel for a quick glance while you work, and the Usage & Budget settings tab for the fuller picture.

Choose a time range, Session (since you opened the app), Today, Week (the last seven days) or All, and see the total cost, the number of runs, and tokens in and out. Two tables break it down: by model and by feature (quick actions, prompt runs, document actions, chat, semantic index, image generation), so you can see at a glance where your spend is really going.
Set a monthly budget in US dollars and the Usage panel tracks your month-to-date spend against it, turning amber past 80% and red past 100%. It is a soft ceiling: a gentle signal, never a wall. Runs are never blocked, whatever the meter says. Set it to 0 to switch the budget off entirely.
A safety net under every save, and clean documents to hand out, however your reader wants them.
Markelangelo keeps local snapshots of each file so you can always step back. A snapshot is taken on save, before an AI change is applied, and whenever you ask for one by hand. Open the history for a file to diff any snapshot against the current version and restore it in a click, all stored locally, nothing sent anywhere.
When a document is ready to leave the app, there is a route for every destination, all from File:
Produce a styled PDF with page options you control: page size, portrait or landscape, margins, and optional page numbers.
A styled, self-contained HTML file with proper syntax highlighting and a light or dark theme.
Send the document straight to a printer, laid out the same way the PDF is.
Copy the document as rich HTML to the clipboard, ready to paste into an email or another editor with its formatting intact.
Whatever you hand over looks finished, embedded images and all, while your source stays plain markdown on disk.
The handful of keys that get you around Markelangelo without lifting your hands from the keyboard.
| Action | Shortcut |
|---|---|
| Command palette | Ctrl+Shift+P |
| Go to file | Ctrl+P |
| New document | Ctrl+N |
| Open | Ctrl+O |
| Save | Ctrl+S |
| Reopen closed tab | Ctrl+Shift+T |
| Toggle sidebar | Ctrl+B |
| Zen mode | F9 |
| Zoom in | Ctrl+= |
| Zoom out | Ctrl+- |
| Ask AI on selection | Ctrl+J |
| Run prompt | Ctrl+Shift+J |
| Chat with Notes | Ctrl+Shift+L |
| Proofread (check spelling) | F7 |
Markelangelo is built on a simple promise: your files are yours, and nothing leaves your machine unless you ask.
This isn't a setting you switch on, it's how the app is made. The editor, and all local or bring-your-own-key work, stays account-free, telemetry-free and sovereign. There is no sign-up, no login, no phone-home, no analytics quietly watching what you type.
Plain markdown, sitting in ordinary files on your own disk. Open them in any editor, back them up any way you like, keep them forever. Nothing is locked in a proprietary format or a cloud you don't control.
You don't create an account to use Markelangelo, and it doesn't report on you. What you write stays between you and your computer.
The only time anything crosses the network is when you run an AI request against a provider you chose, and even then, the Totally Local stance keeps it all on your machine.
Bring-your-own-key means the credentials are yours, stored encrypted on your device and used only to talk to the provider you named.
If you live in your documentation, the writers, researchers, engineers and note-keepers who spend their days inside their words, this is the difference between a tool you rent and a tool you own. Your ideas, drafts and half-formed thoughts are some of the most personal things you make. They deserve a home that treats them as yours alone.